Soft Retro Lighting
Christopher Grey explains how to recreate the look of portrait lighting from the 1950s.

Photographer Chris Grey is an expert on lighting. He's written seven books on the subject, teaches classes and workshops, and is a strong advocate for precise control in the studio. To see more of his work, or to find his books and DVDs.
Photography as a medium went through some astounding changes in the 1950s. Studio strobes were more commonplace, although rather dangerous, and softer light began to replace the harder light popular in previous decades. Color film stocks, both film and paper, were significantly improved, and, as more photographers worked in color, costs came down.
Arguably, the greatest contribution we saw from the fifties was not to color photography, but rather to the national color palette itself. After the drab years of war and rationing, America went design and color crazy, with pinks and greens leading the way. One of my favorite movies from that era is Forbidden Planet, a 1956 epic about an invisible menace on a distant planet. Set on the mythical Altair IV, a space ship lands and meets a reclusive scientist and his beautiful (what a surprise) daughter. Strangely, their home is decorated in many shades of pink and green, from the flat, ‘50’s style couches to the costumes. This color palette was assimilated by many other countries as well, as any quick look at vintage beauty books and magazines will show.
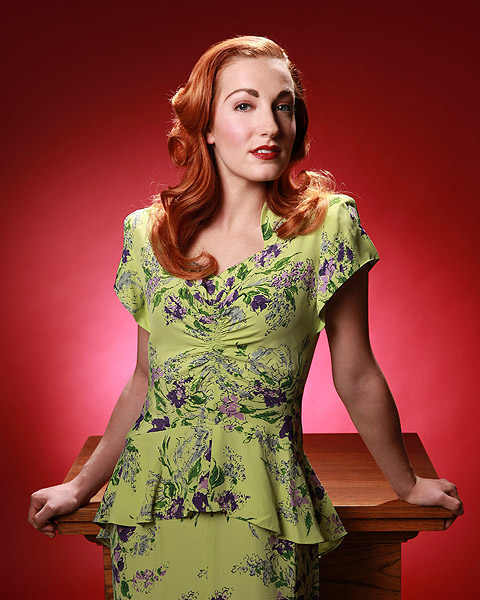
In print, art directors often favored backgrounds and props similar in color to the wardrobe a subject would be wearing. It may seem odd at first because today’s backgrounds are generally more sedate and neutral, but the effect is quite striking and should be used to set the stage for a believable retro portrait.
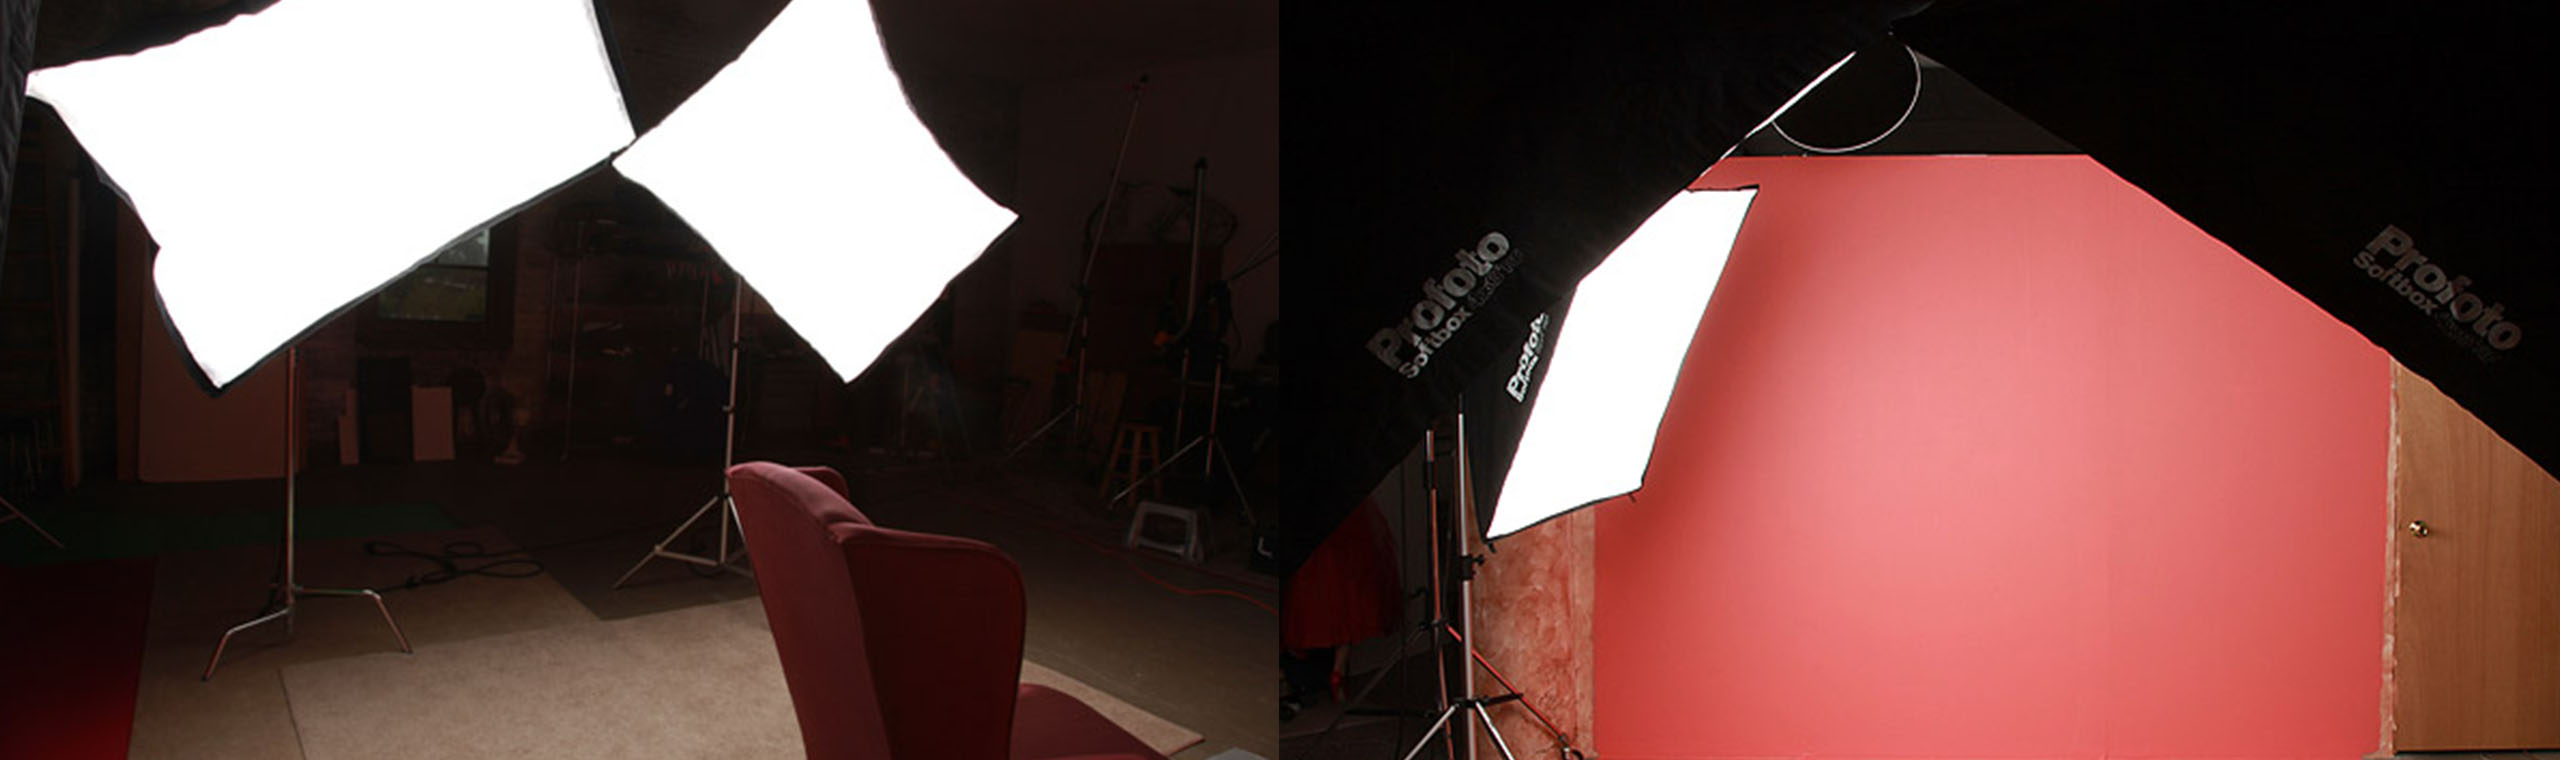
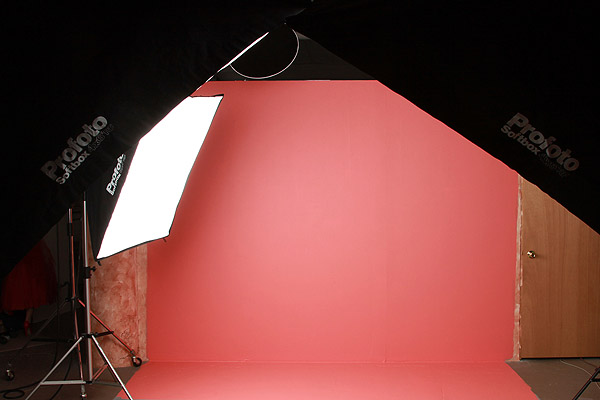
I began my first set by centering two large softboxes about four feet in front of the chair my model would be using as a prop. The boxes were placed at diagonals to each other, overlapping slightly at the bottom corner.
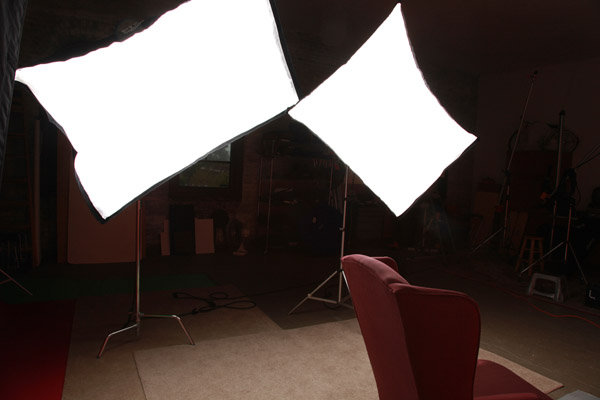
The size of the softboxes guaranteed a very soft light. Even though the chair itself was only about four feet from the background, the size of the source meant any shadow would be so soft as to be unrecognizable. Tipping the boxes diagonally allowed me to shoot through the “tunnel” and from behind the lights.
After my lights were placed, I metered each other separately, with the other completely turned off, from where my model’s face would be. Once the first light was set to an f/stop that I liked, it was turned off. The remaining light was adjusted to the same power and f/stop. The first light was turned back on and both lights were metered together to produce the working aperture, f/13 in this case.
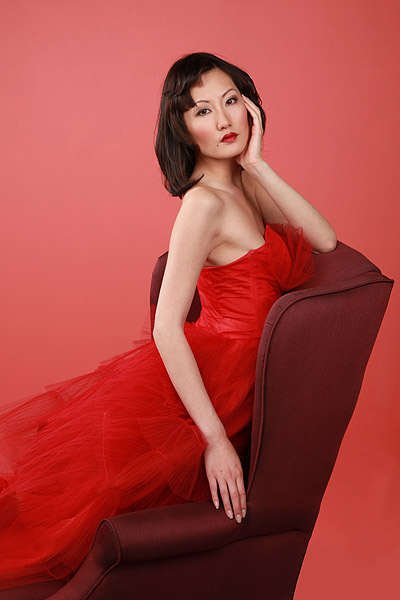
Once the model was out of makeup and into her wardrobe, the exposure was metered with her in place and the chair was moved slightly so her face would receive a perfect f/13.
I’ve worked with this model many times, and I enjoy her sessions not only because she’s intelligent and lovely but because she’s capable of a range of subtle attitude that eludes many other models, and can produce those looks at will. This first image was made with only the two softboxes.
Next, I added a medium softbox at camera left, placing it closer to the background than the model. I wanted to create a very soft, almost unseen, highlight on her side, so the new light was powered to the same f/stop as the two main lights. Given the wraparound nature of the two softboxes, the only places the highlight is visible is where it crosses light from the mains, almost nowhere. Light plus light equals brighter light.
Before we go any further with colored backgrounds, let me show you an easy way to contemporize a shot like this.
I kept the two softboxes where they were but added a hair light, a beauty bowl fitted with a 25 degree grid to direct the light to the model without spilling into my lens. It was powered +1/3 stop over the main lights. I used two pushpins to anchor a chunk of black indoor/outdoor carpet on the wall behind the model. Carpet absorbs much more light than black paper would ever be at this distance (four feet) behind the model, almost 100% in fact.
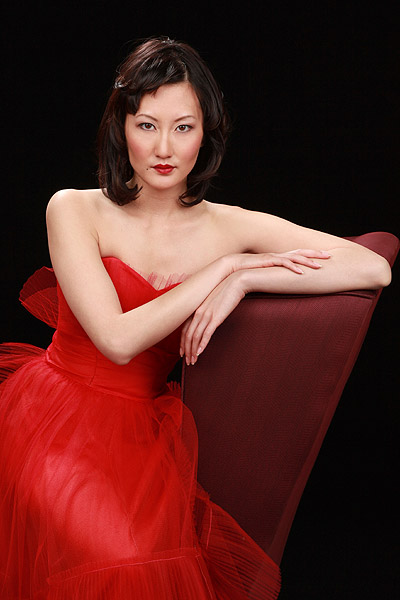
The result against black loses a bit of its retro authenticity, but none of its visual power.
Now, back to our retro article.
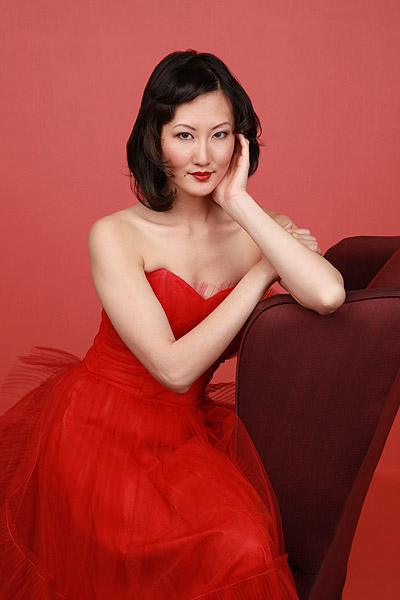
Not every shot used soft light, and not every shot utilized backgrounds similar to the wardrobe. Frequently, photographers set backgrounds that were complimentary (the opposite color) to the wardrobe.
Many lighting styles evolved during the fifties as well, including one that used both hard and soft light at the same time. I’ve written many times in other books and articles about how to use a double main light to get unique and spectacular effects but, fortunately, there are many ways to create it that are still discoverable, something that’s great for me because I love the look (you will, too).
I began by setting a medium softbox approximately eight feet from my model would be standing. I then placed a beauty bowl, fitted with a 25 degree grid, about three feet in front of it. Both lights were angled the same, with the beauty bowl centered on the softbox. This meant the softbox had to be higher than the reflector to get that angle.
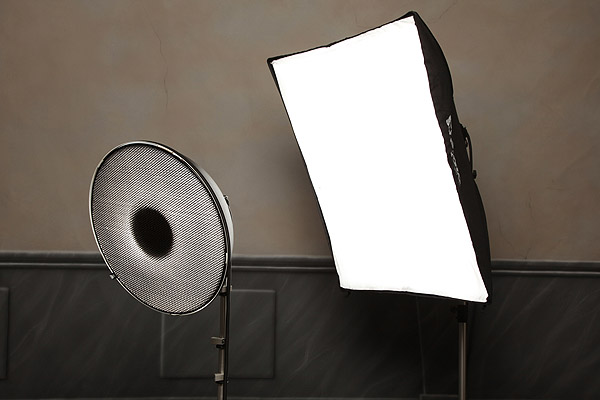
Just like the first example, it’s important to meter each light separately, then together to get the working aperture. With the model in place, I metered the beauty bowl first, powering it to a perfect f/8. Whenever you work with a gridded light, it’s necessary to meter the center of the hottest light that falls on the model, because the light falls off dramatically from that point, especially when using a tight grid. In this case I centered the light on the model, measuring the light from the center of her face, right between her eyes.
After turning it off, I powered and metered the softbox to f/4, two stops less than the reflector, placing the meter in the conventional position under the chin. With both lights on, another reading was made to get my working aperture.
For accent and “punch,” I set a light with a standard parabolic and 20 degree grid aimed at the background, directly behind the model. This light was powered to +1 stop over the working aperture, as measured at the hotspot, guaranteeing a spot of light brighter than the background.
I placed another light, with a 40 degree grid on a boom, directly above and slightly behind the model, aimed at her shoulders. This light would illuminate her a bit like an aura, accenting her shape and posture.
The images I got with this scenario are superb. A wide spot of light accents her face, shoulders and upper chest, falling off to softer light below. The background light produces a complimentary color to her wardrobe at the spot, and the hair light allows her retro hairstyle to absolutely shine.