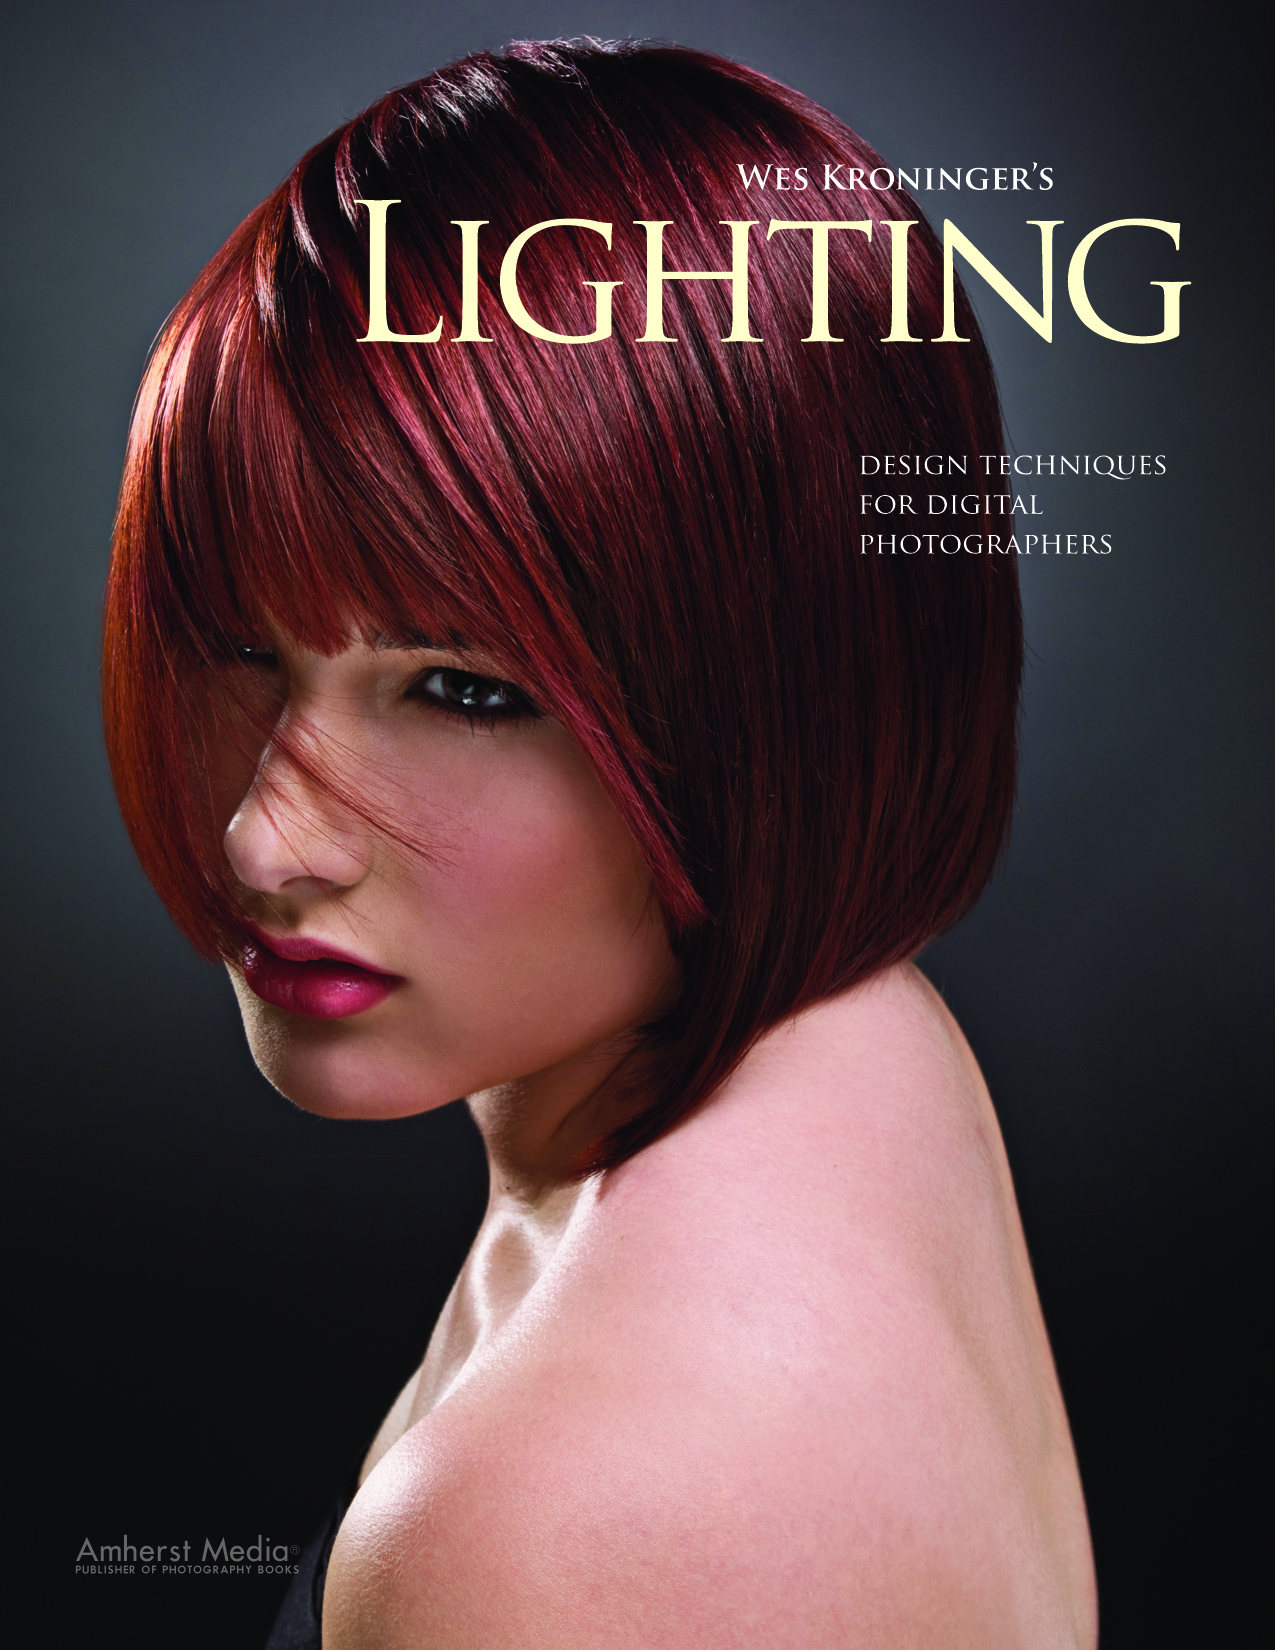
Selections from Wes Kroninger's Lighting
Commercial and editorial photographer Wes Kroninger tells the stories behind his images, providing lighting diagrams, technical details, and tips in ten selections from his Amherst Media book.
This excerpt from Wes Kroninger's Lighting is provided courtesy of Amherst Media. To purchase the book and learn more about the publisher, visit the Amherst Media Web site.
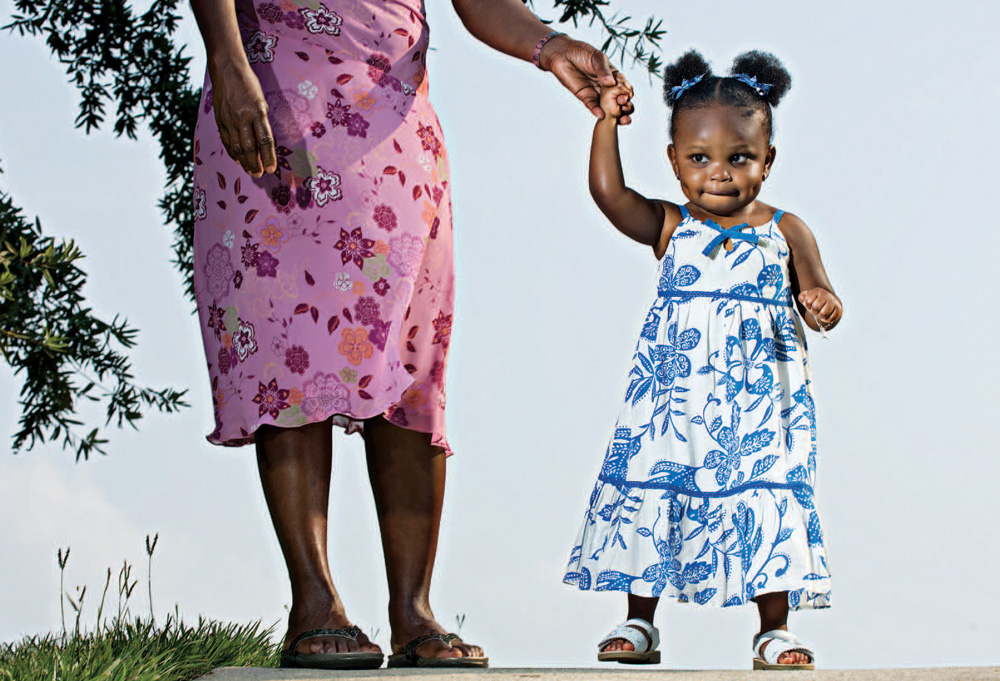

9| The Scoop
The location that was chosen for this image was right at the top of a hill. The camera was actually rested on the ground, not on a tripod, down the hill from the subject—so, essentially, the camera perspective is below ground level from the subject’s position. This gave the little girl a heroic stature. The image was to accompany a magazine article about the challenges that come along with raising special needs children. I have always loved the way the stalks of grass mimic mother and daughter in this image.
Tech
As is the case with most of my location lighting setups, I used one light and a reflector. The subject was positioned so that the morning sun slightly backlit her, then I spot metered the sky in the background and adjusted my flash to that setting to retain its detail and color.
10| The Scoop
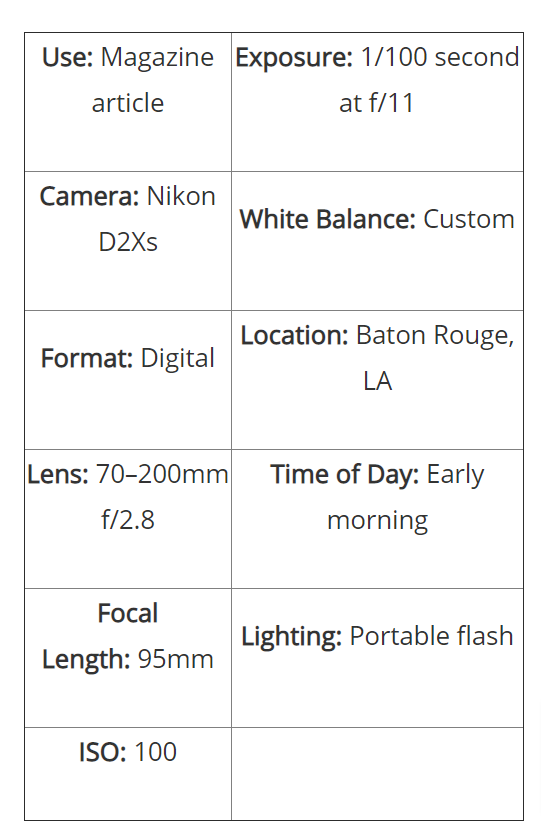
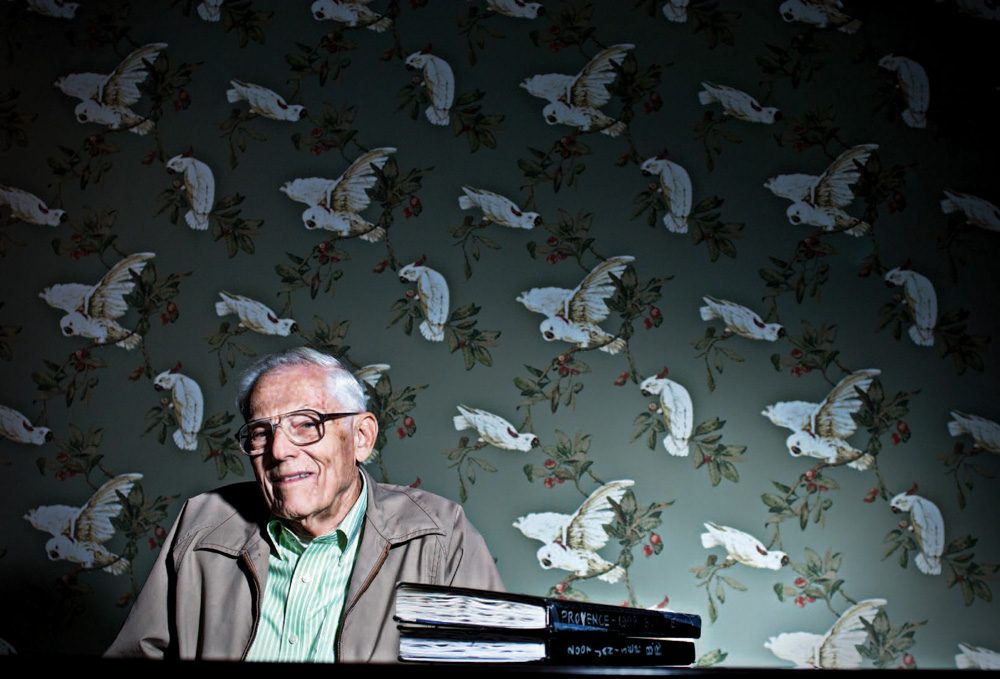
Frequently, when on assignment, the details do not come together until the last second. When I was assigned to photograph an artist now living in a retirement home, the original intent was to photograph him in his apartment. However, because the room had no interesting angles and the light was bad, I made the decision to take him outside and do his portrait there. As he led me through the building, we walked through the dining area and I noticed this wallpaper covered in birds. I knew immediately that this was the perfect location for the image.
Tech
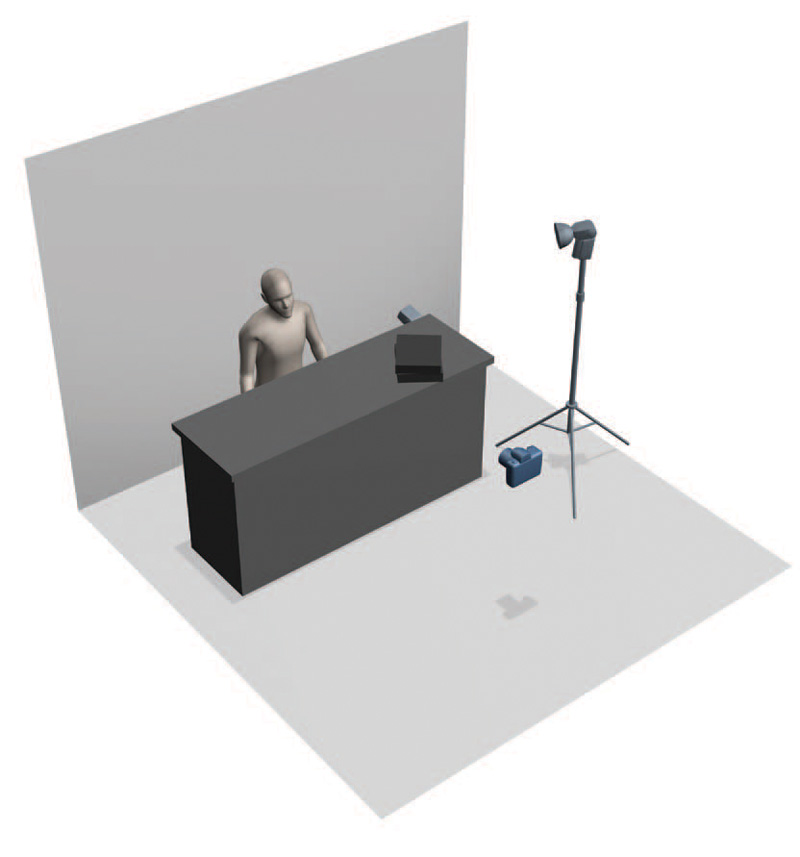
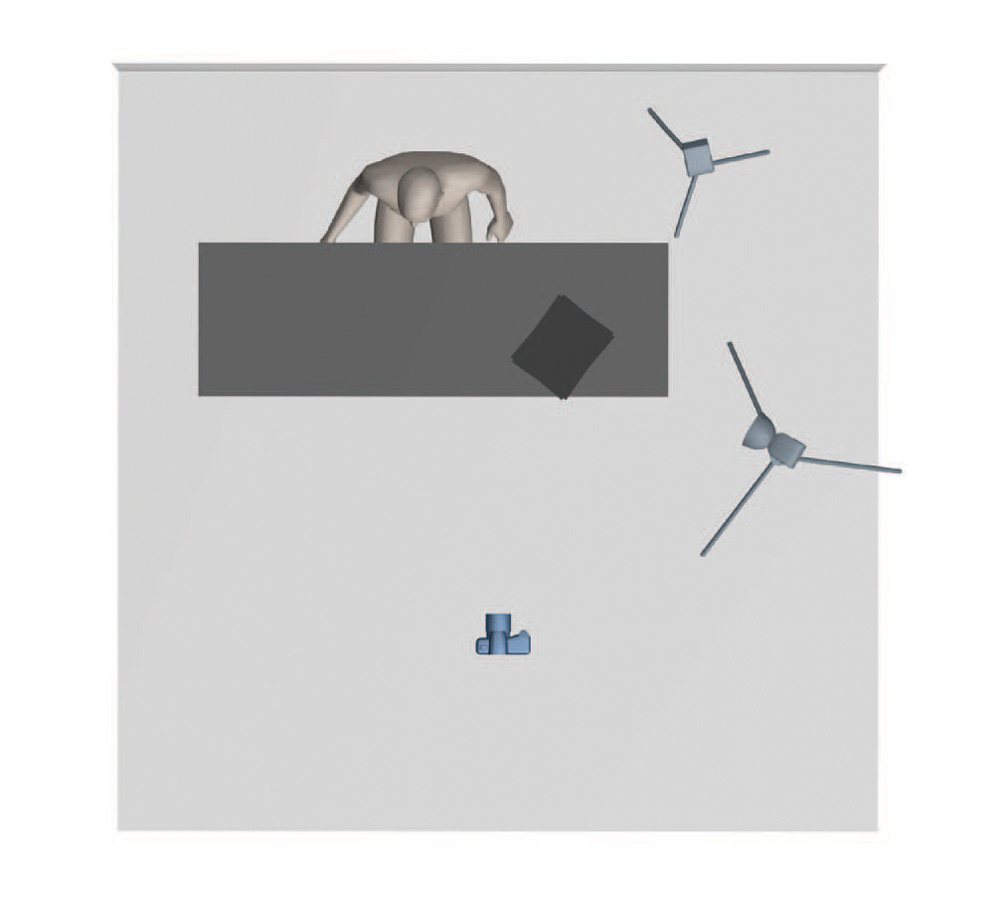
Two electronic flash units were used to create this image. One flash was used to light the background and one, fitted with a standard reflector, was used as the main. The background light was positioned on a chair behind the table, while the main light was placed on a light stand around six feet high. Both lights were triggered with slave units. A shallow depth of field was chosen to give some separation from the decorative wallpaper.
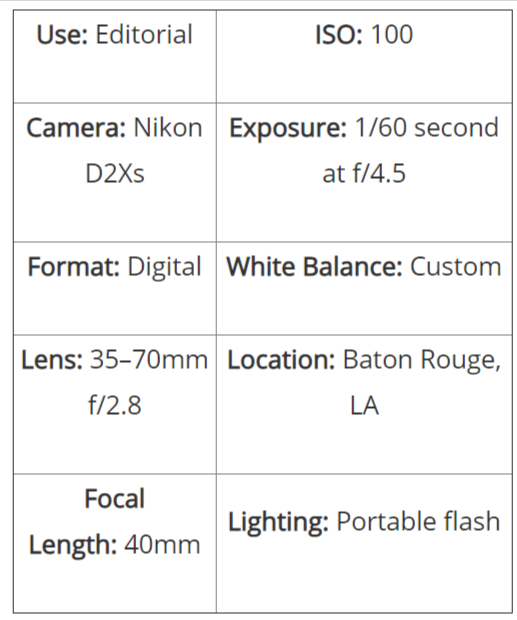

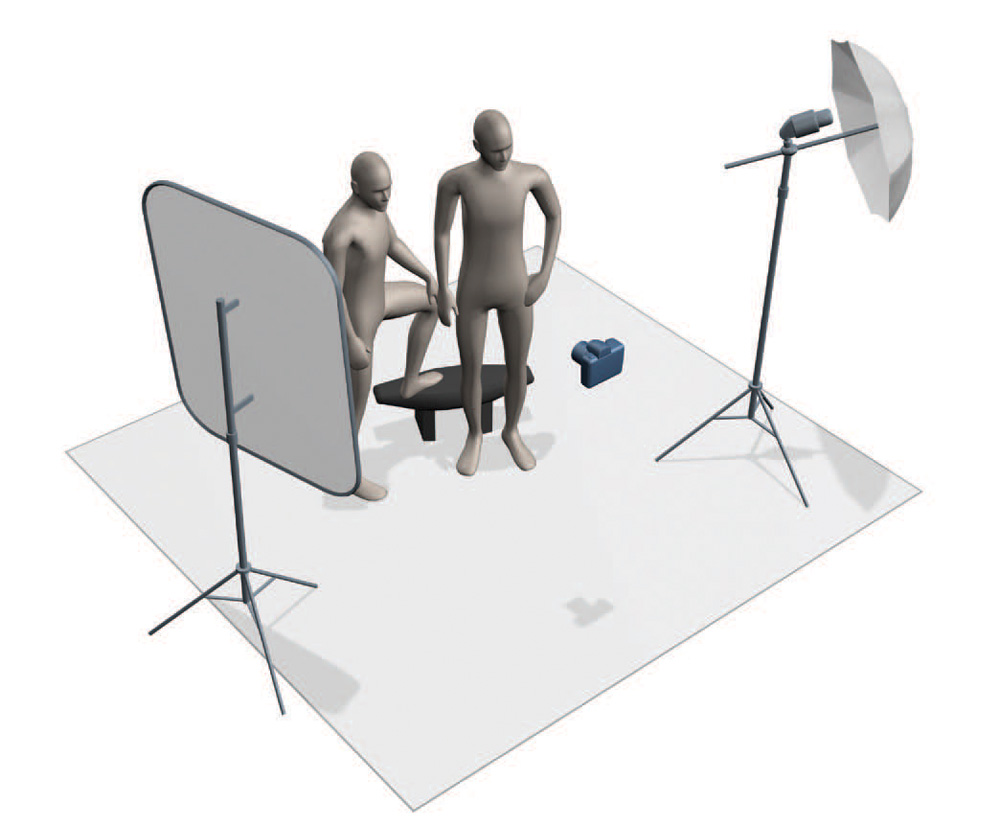
11| The Scoop
For this image of two businessmen, my client had requested that the men be photographed with the city in the background. There was only one vantage point where this could be done, and it would mean positioning the men in the direct sunlight. For this reason, I chose to photograph them in the early morning so that the rising sun would be at their backs.
In south Louisiana, it is extremely hot and humid—even in the early morning hours—and I knew that my subjects would be in business suits. When the gentlemen I was to photograph arrived at the location, I instructed them to park beside the spot I had set up, then remain in their air-conditioned vehicle until I was sure I was ready. I knew that I would only have a few moments before both men would begin sweating, so when I was ready I asked them to step in front of the camera and only photographed them for three or four minutes.
Tech
I used one strobe with a standard white umbrella as my main light. A silver reflector was set at camera left to generate some fill. I took an incident meter reading for the ambient light and set my exposure in accordance with the camera’s maximum flash-sync speed. I then chose a lens that would give me the correct amount of coverage I was after.
Tip
This was one of those shoots where anything that could go wrong did go wrong—and nothing can drive home the importance of thorough location scouting more than one bad shoot. When I originally scouted the location for this image, I looked to see if there was power in the vicinity of my desired location. I noticed that there were electrical outlets nearby—but what I failed to do was check if these power receptacles were active. When I returned on the day of my shoot to begin setting up, I realized there was no power to the outlets. My subjects were on their way and I was scrambling to find power. A quick test with a voltage meter could have solved this problem.
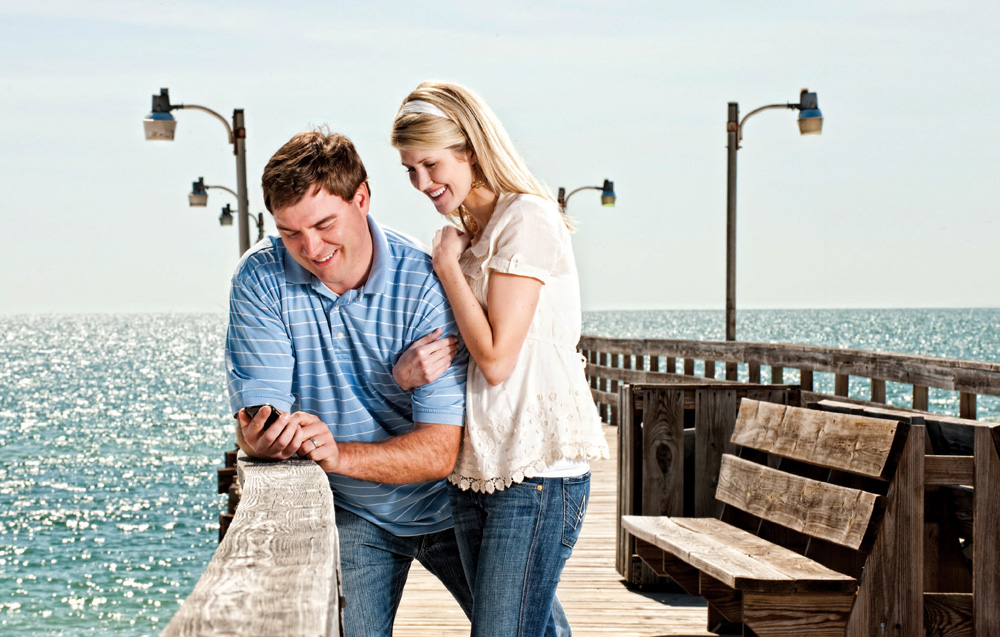
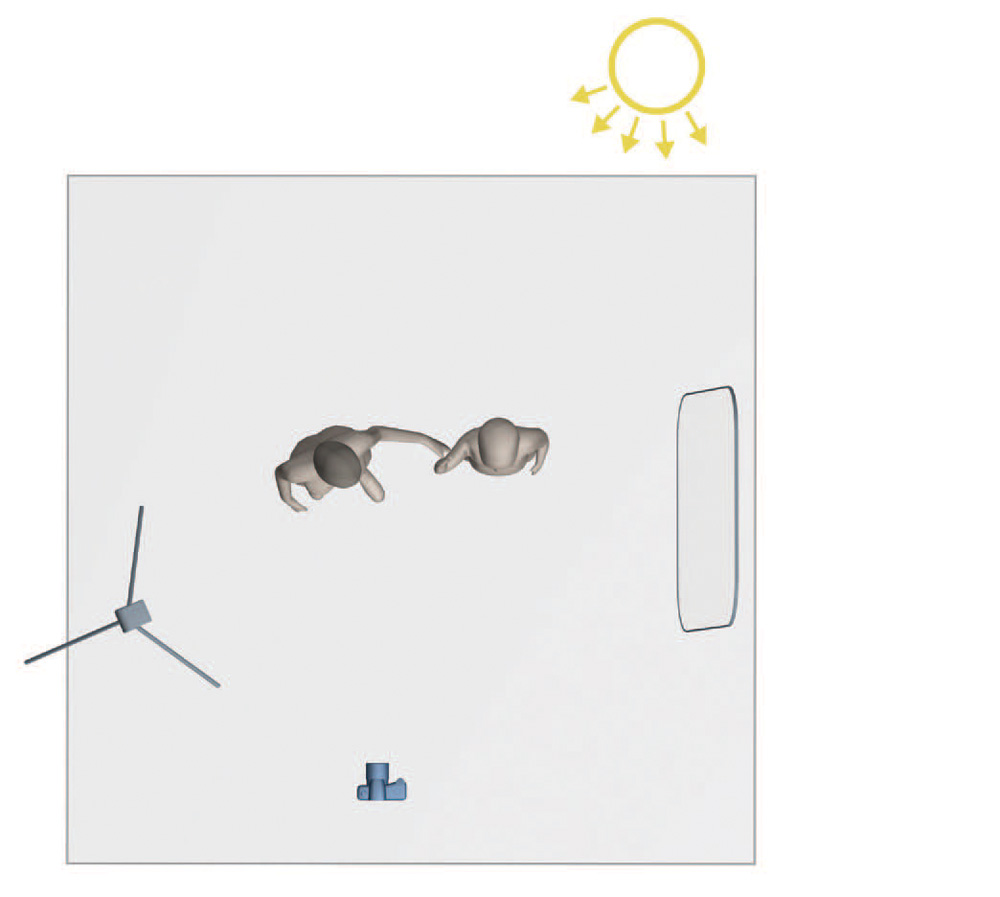
12| The Scoop
This image was created for a bank to promote the bank’s web site and express the feeling of “online banking.” Although it was a hot summer day in Florida, finding a comfortable pose for my models and encouraging them to relax produced a calm and pleasing fTecheeling in the image.
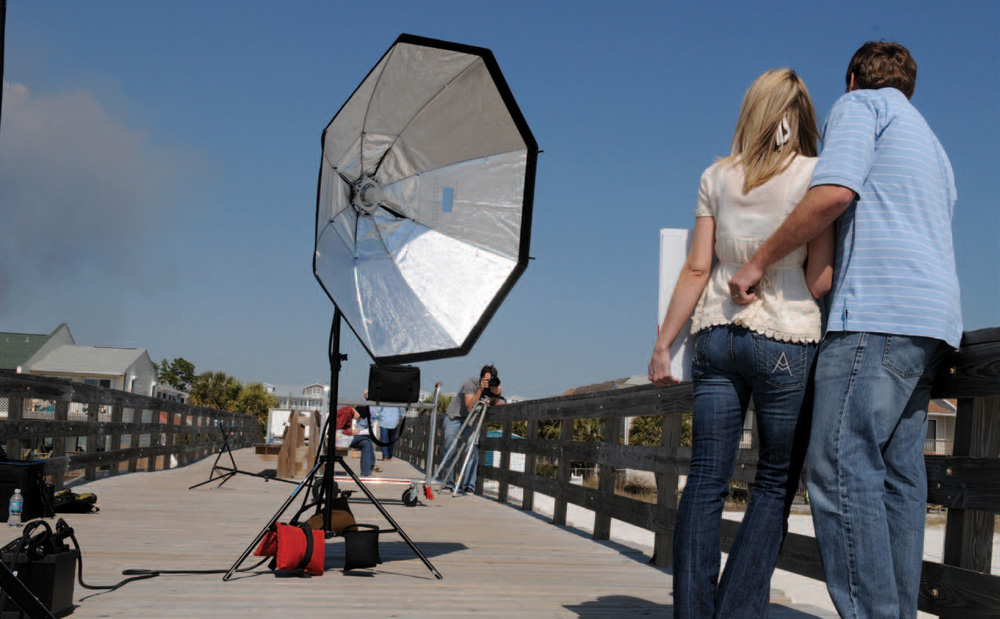
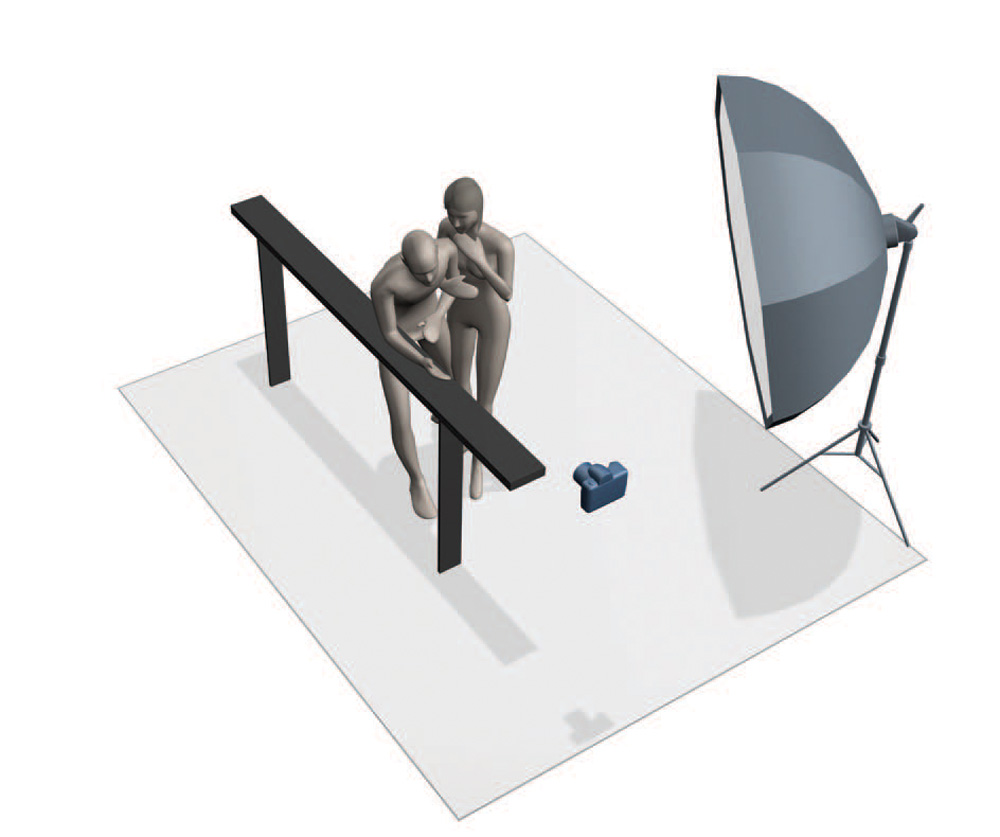
Tech
Overpowering the midday sun with flash is a great way to get bold, saturated lifestyle images. A light that is strong enough to overpower the bright sunlight is required for this technique, but the results are always pleasing. You can see from the bright light on the gentleman’s shoulders that, if not for the strobe, the couple would be entirely backlit and in shadow. Metering for the ambient light, then setting my flash (fitted with a five-foot Octabank) to match the reading resulted in a poppy, saturated image. (Note: In this situation, adjusting the camera settings for the shadowed side of the models would have resulted in an extremely overexposed background scene. Using a reflector would have torched the models with a continuous light source at the same intensity as the sun.)
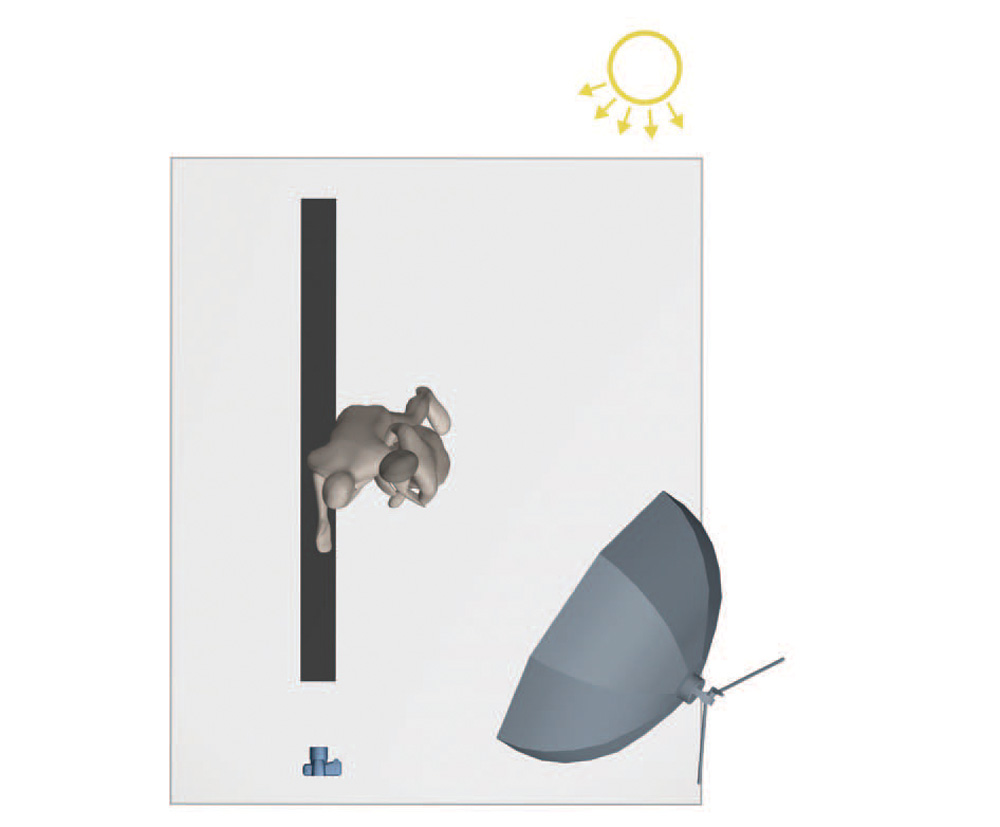
Tip
Outdoors, the background scene will dictate how you will need to position your models and lights. If the background consists of standing objects, such as trees or buildings, backlighting your models with the sun will also result in a backlit and shadowed background. A better scenario would be to time your shoot for when the background is front lit, then knock the direct sun off of your models with large scrims. Strobes could still be used at this point to match the sunlight on your background.
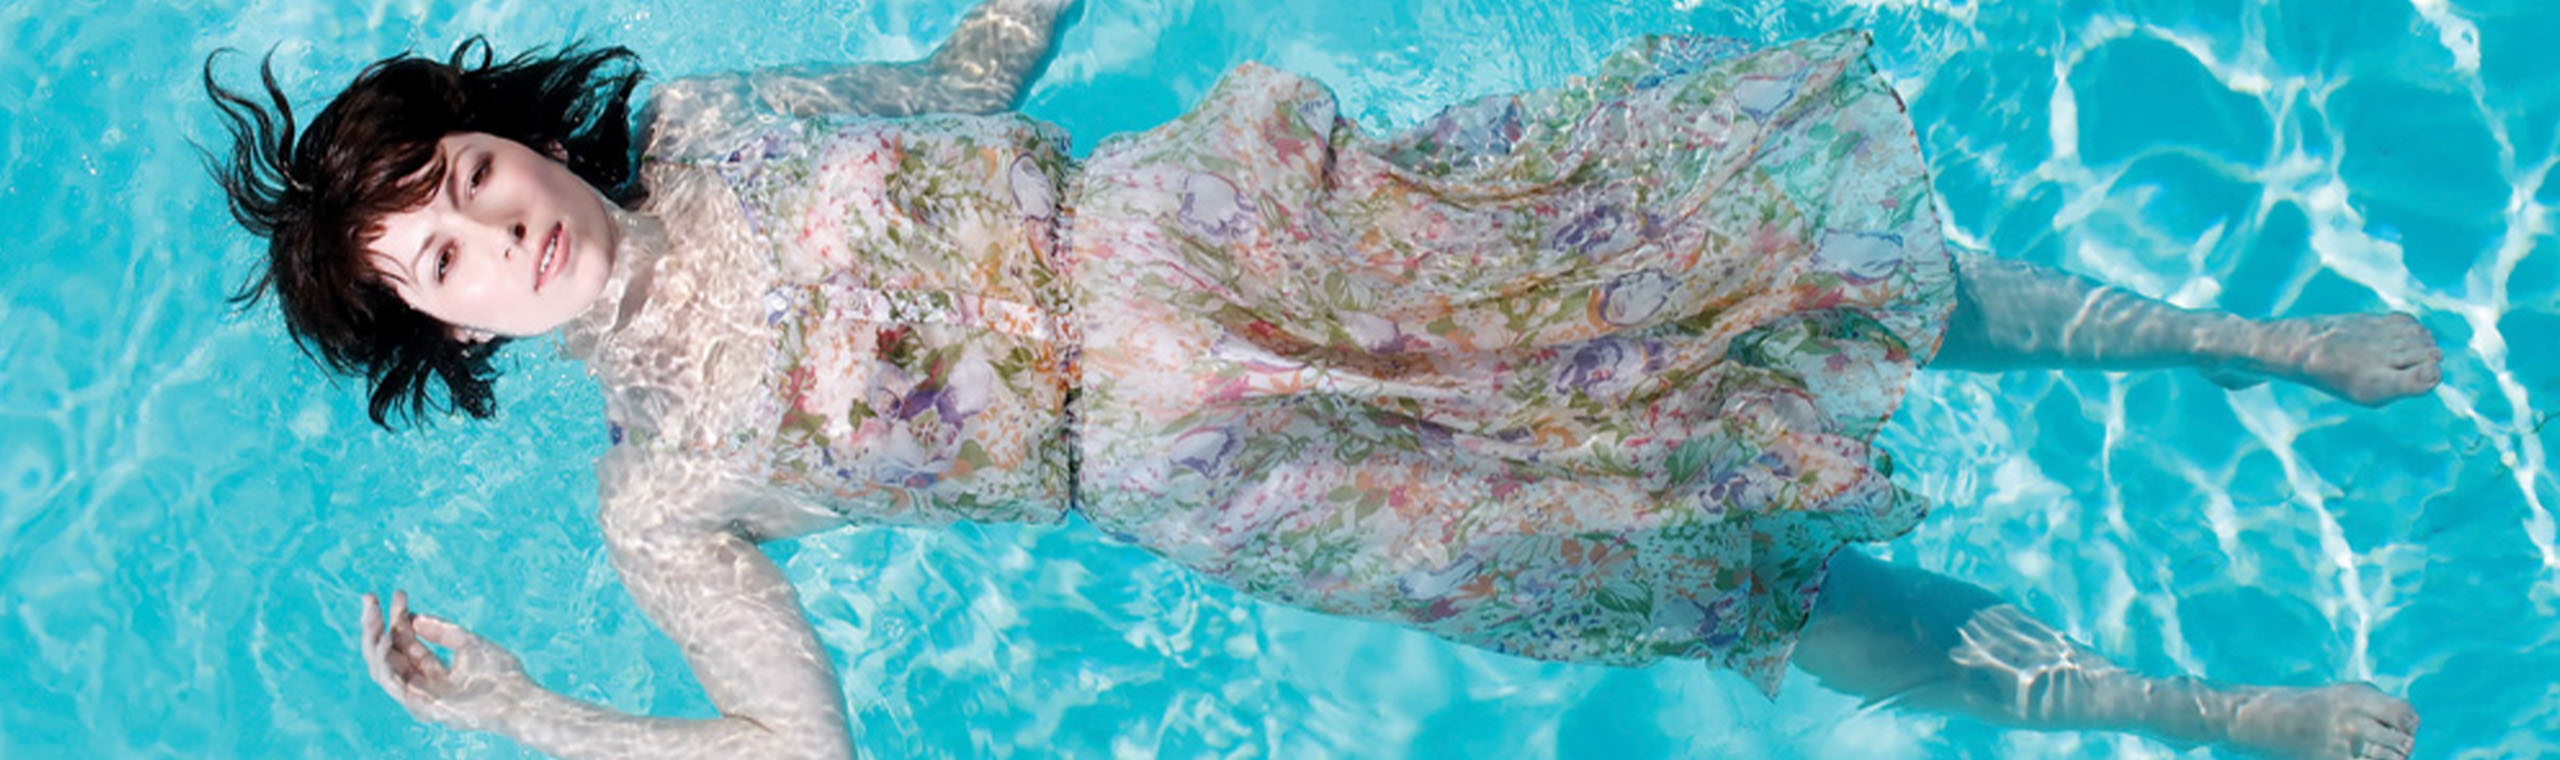
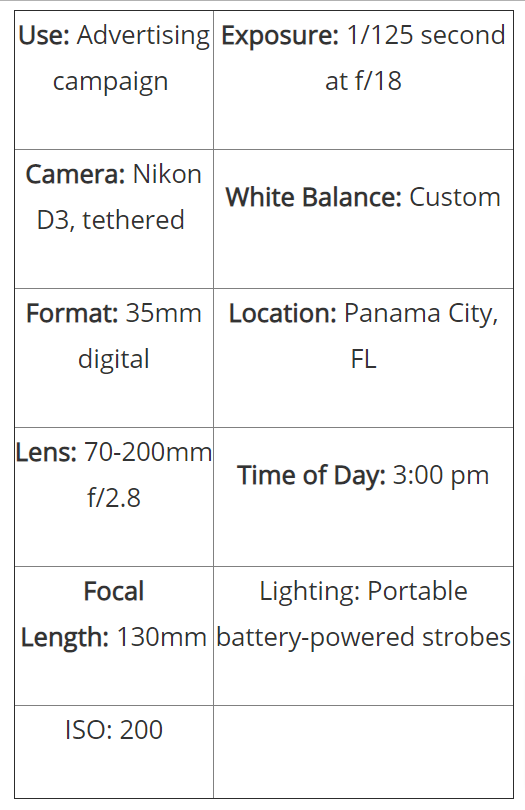
13| The Scoop
Never underestimate what your subjects are willing to do for you to get the shot you want. Here, I was tasked with photographing an author who had won an award for a short story about the racial segregation of public swimming pools in the South. When I spoke with the art director, we decided to take her photo at a local public pool and I asked, “Do you think she would get in the pool?” The art director replied laughing, “It never hurts to ask.” The author said she was up for the challenge—as long as she didn’t have to wear a bathing suit.
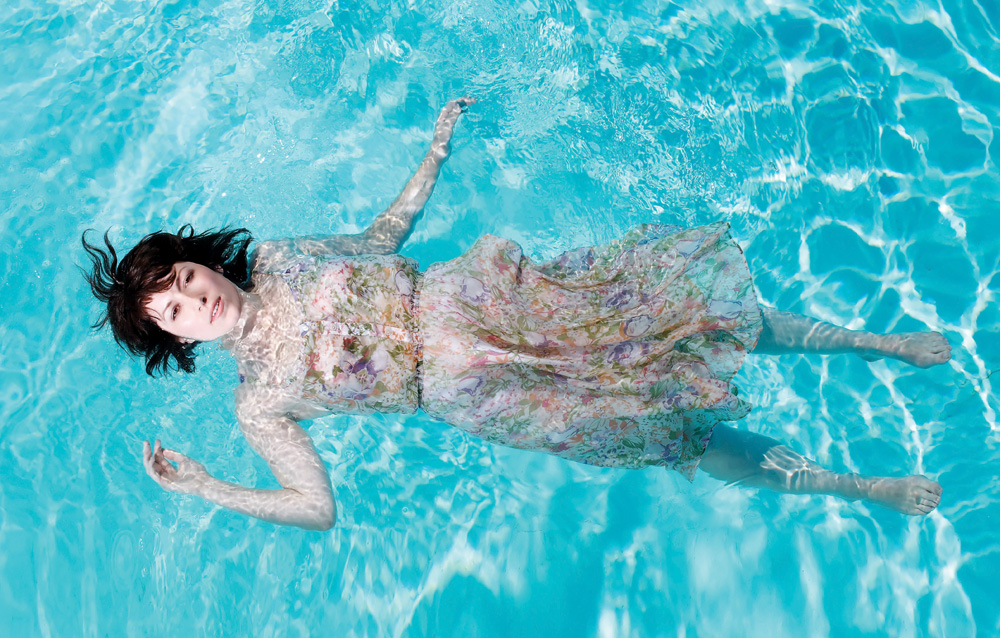
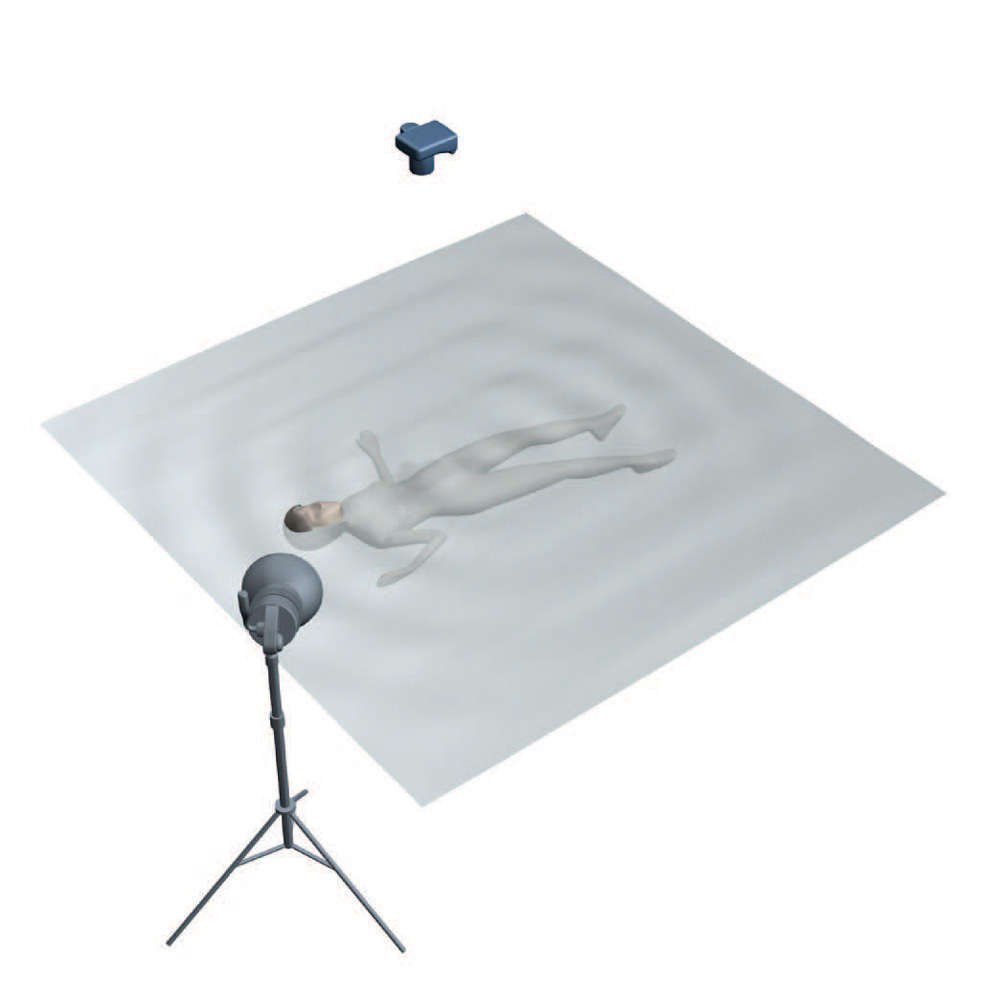
Tech
The vantage point of the camera is from the lifeguard tower. The lighting was one strobe unit with a standard reflector fitted with a grid. It was a sunny morning, so I needed focused light at high power to overpower the sun. I metered for the water and the bottom of the pool, setting my exposure to make sure that the blue of the painted pool bottom would be very saturated. I was lucky with the wardrobe she chose for the shoot. Not only did the fabric move very nicely in the water, but the color was also a nice contrast with the blue pool.


16| The Scoop
To create a great image, sometimes we have to work with what we are given. I had specific thoughts in mind for this photograph that involved my subject being outdoors. When we arrived, however, we were informed that, because of health concerns, the subject was unable to get down the steps into the yard. We regrouped and set up the image on the patio to give us a feeling of the outdoors while keeping our subject comfortable. Choosing the proper camera angle and effectively using our lighting, we were able to create an image that maintained a lot of what we were originally after.
Tech
Knowing what your lights can do can get you through these situations with your previsualized image intact. Here, the camera’s view gave me a glimpse of the outdoors while adding an element of texture that was a nice surprise. One power pack was used with two heads. Meter readings were taken of the ambient light outdoors and the strobes were set to match this. The main head was equipped with a 4x6-foot softbox placed to camera left as the main light. Another light, with a cable extension, was run outside and aimed through the screen in the patio; this light had a grid on a standard reflector to create the edge light.
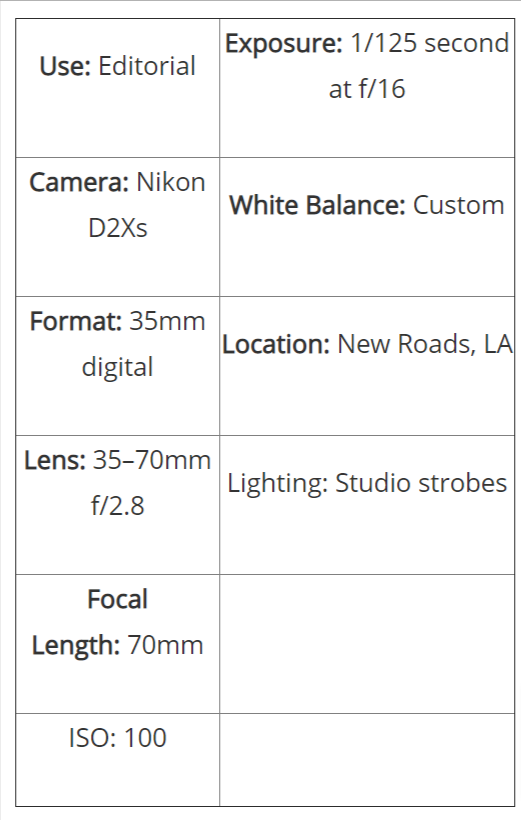

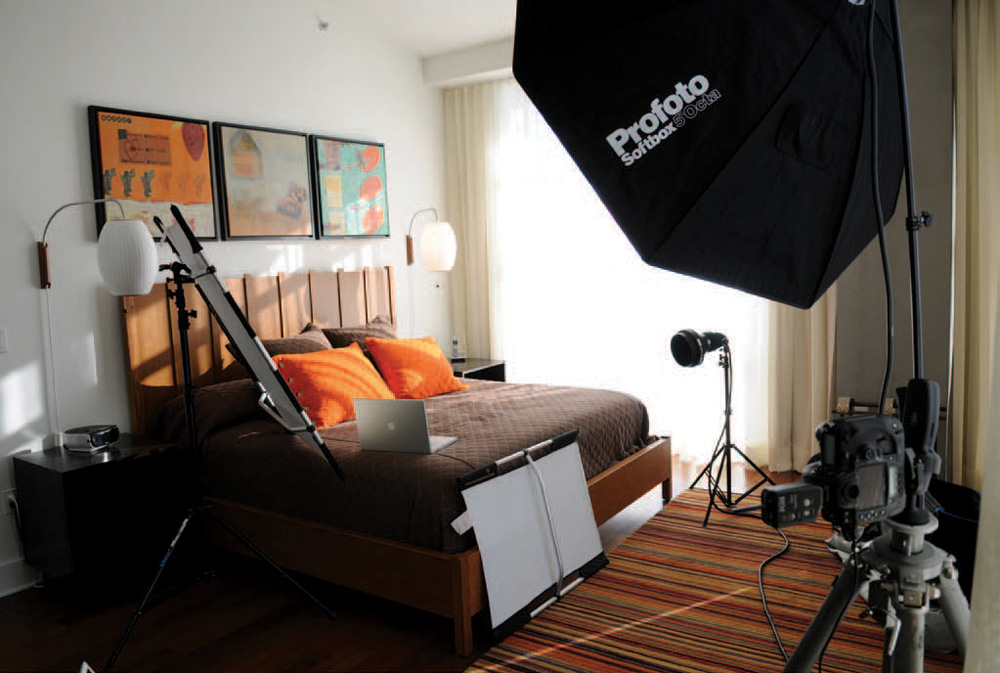
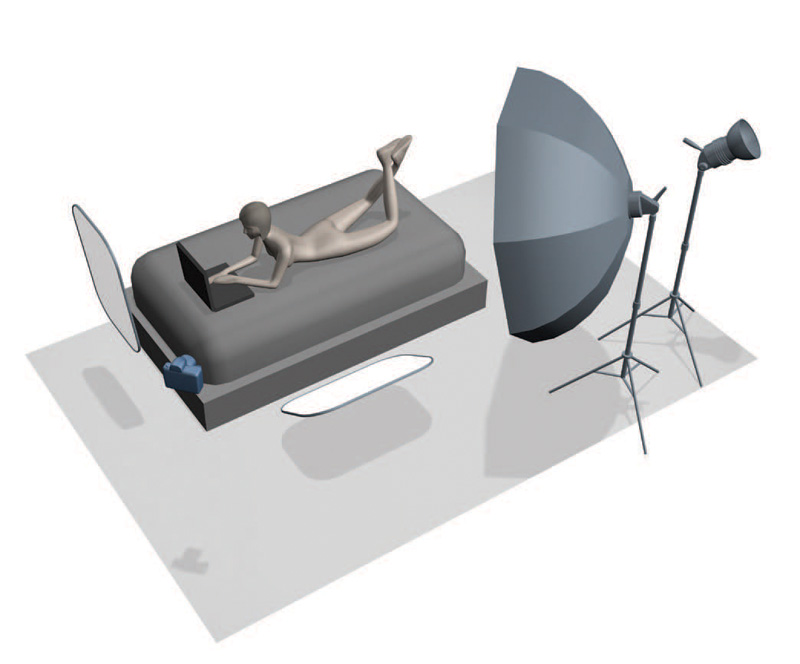
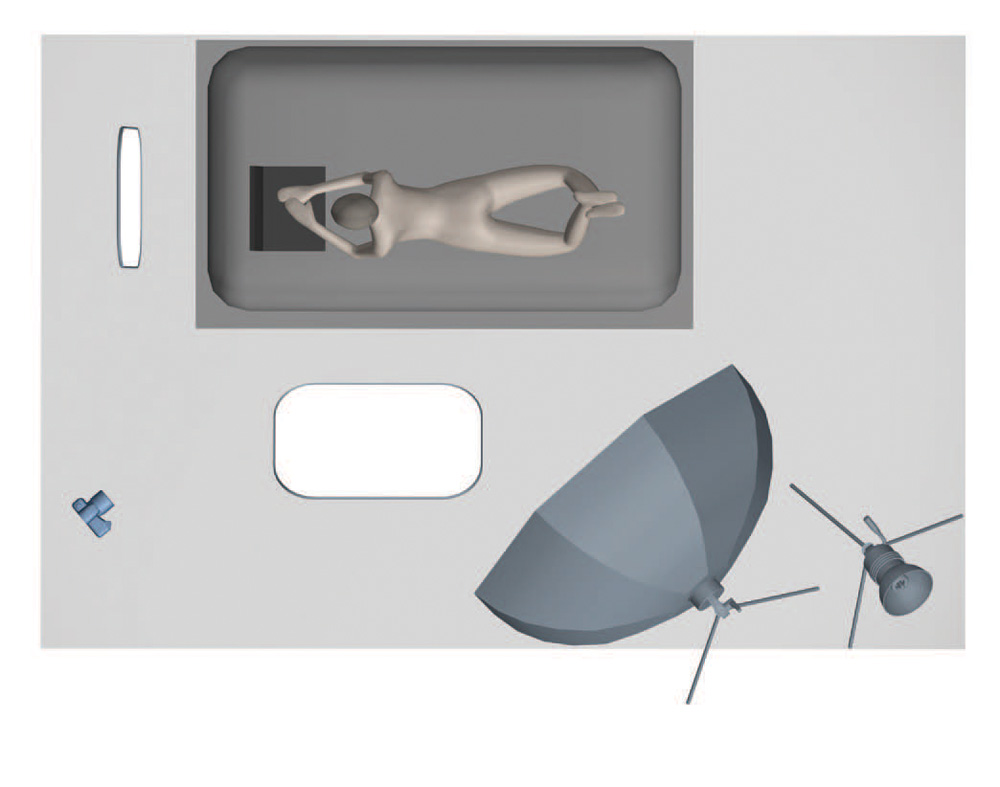
19| The Scoop
In this image, the goal was to light the room as though it was illuminated by sunlight spilling in from outside. It was a third-floor room, so it would have been impossible to place lights outside. We solved the problem by selecting a time of day when light was coming through the window. Although the window light was not enough to adequately illuminate our subject, it was enough to create the illusion of natural light. Adding artificial light from the same direction as the streaking sun made the look believable.
Tech
Ambient spot meter readings were taken of the areas of the bed where the sun was hitting the pillows and headboard. I set my overall exposure to match those areas, so they did not blow out. One large umbrella was placed to the right of the camera and up around head height. Another light with a standard reflector was aimed at the corner of the ceiling and the wall, adding an overall fill to the room. Reflectors, placed to the left side and from below at the front of the bed, were used to add fill. The finished image appears light and airy—just what the client wanted.
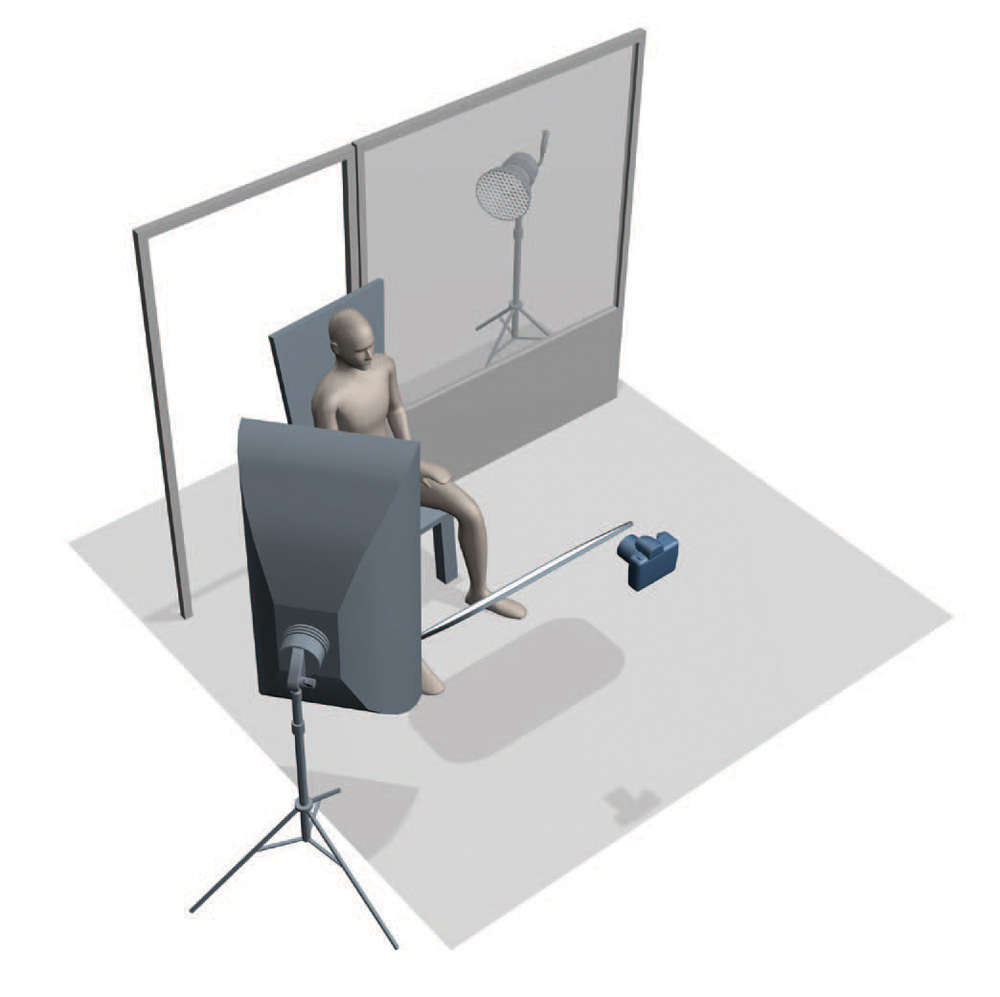
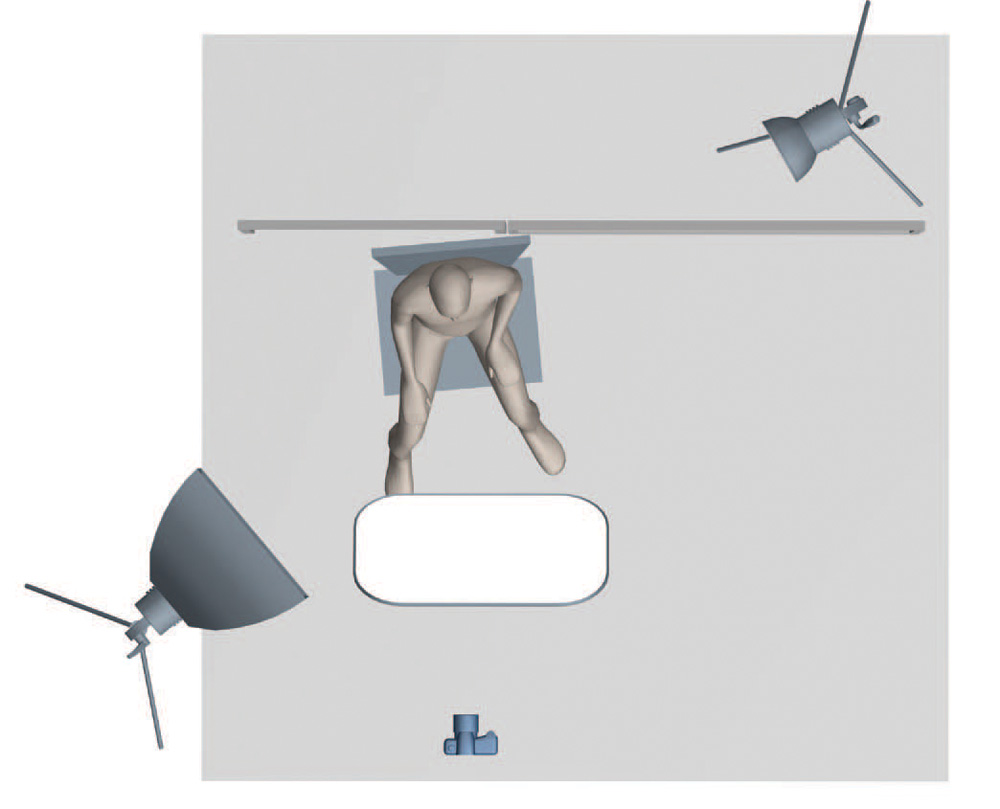
28| The Scoop
Sometimes things outside of our control can foil the best drawn-up plans. Originally, I had wanted to do this image outside. Given that we were shooting in south Florida in the summer, I knew the only way to do this comfortably was early in the morning. The shoot was scheduled to start at 9:00 a.m.; however, unforeseen delays with the styling team pushed the shoot well into the afternoon. We tried to do the shot outside, but the heat was unbearable, so I decided on another option.
Tech
To get the look of an outdoor shot but remain in the comfort of air conditioning (for our model’s sake), I placed the model in a doorway. I took an ambient meter reading for the trees in the background and set my lights to match that reading. I used a single flash head fitted with a Fresnel spot to mimic the sun. The resulting image appears to have been photographed in the direct sun but was actually a combination of ambient and artificial light. A reflector was placed outside for the bit of edge light you can see on the model’s neck and shoulder.
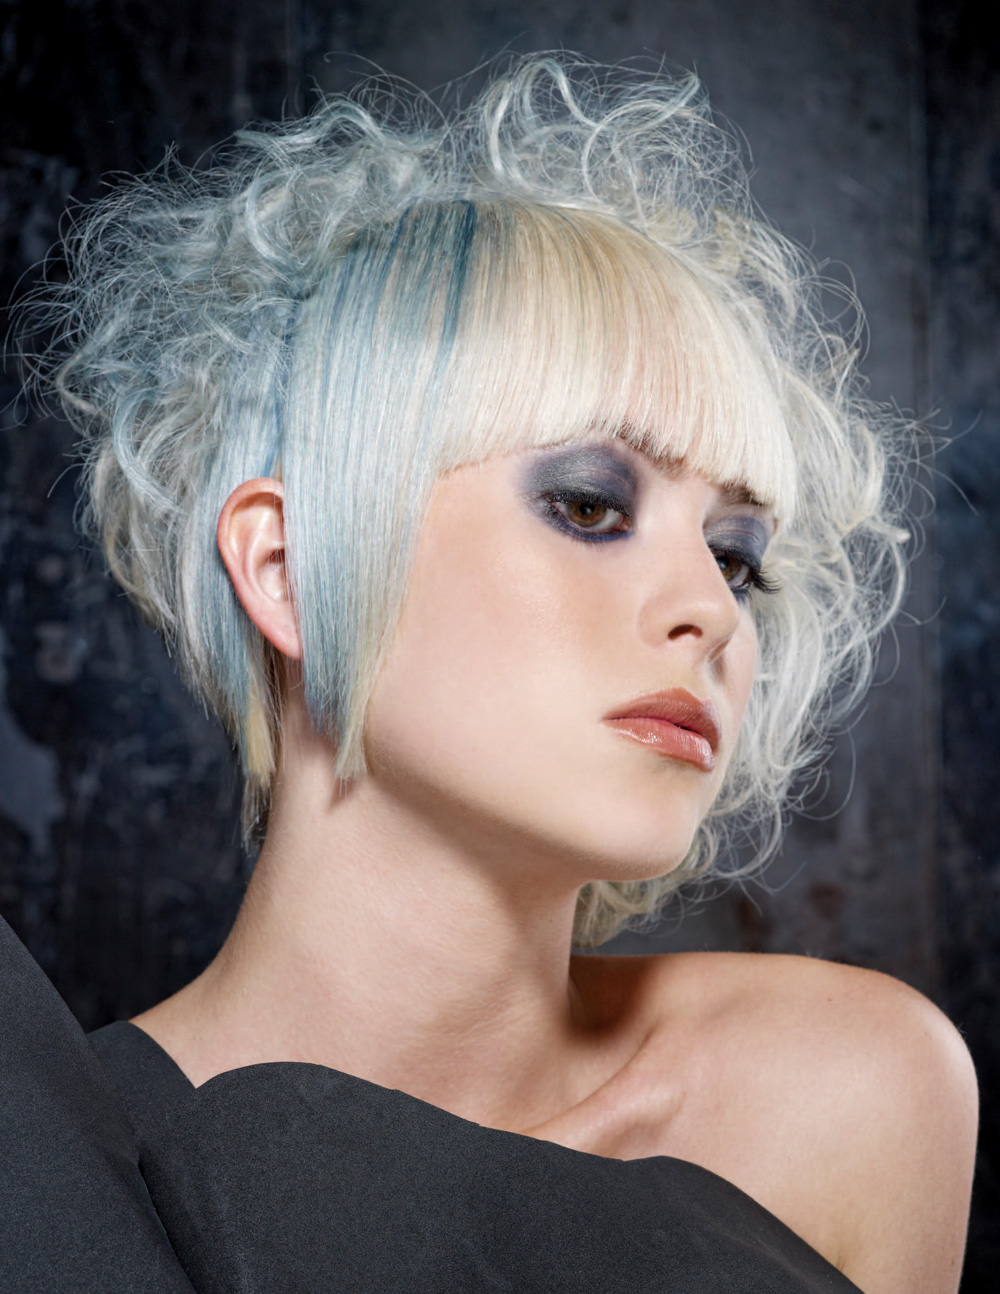
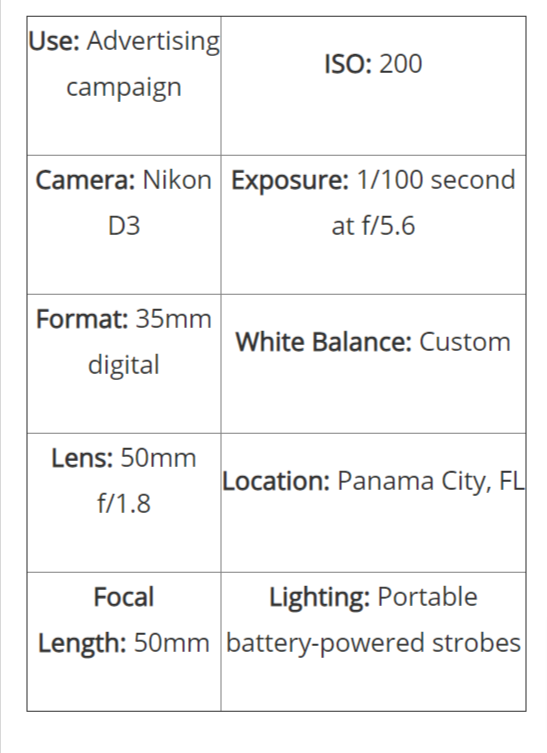
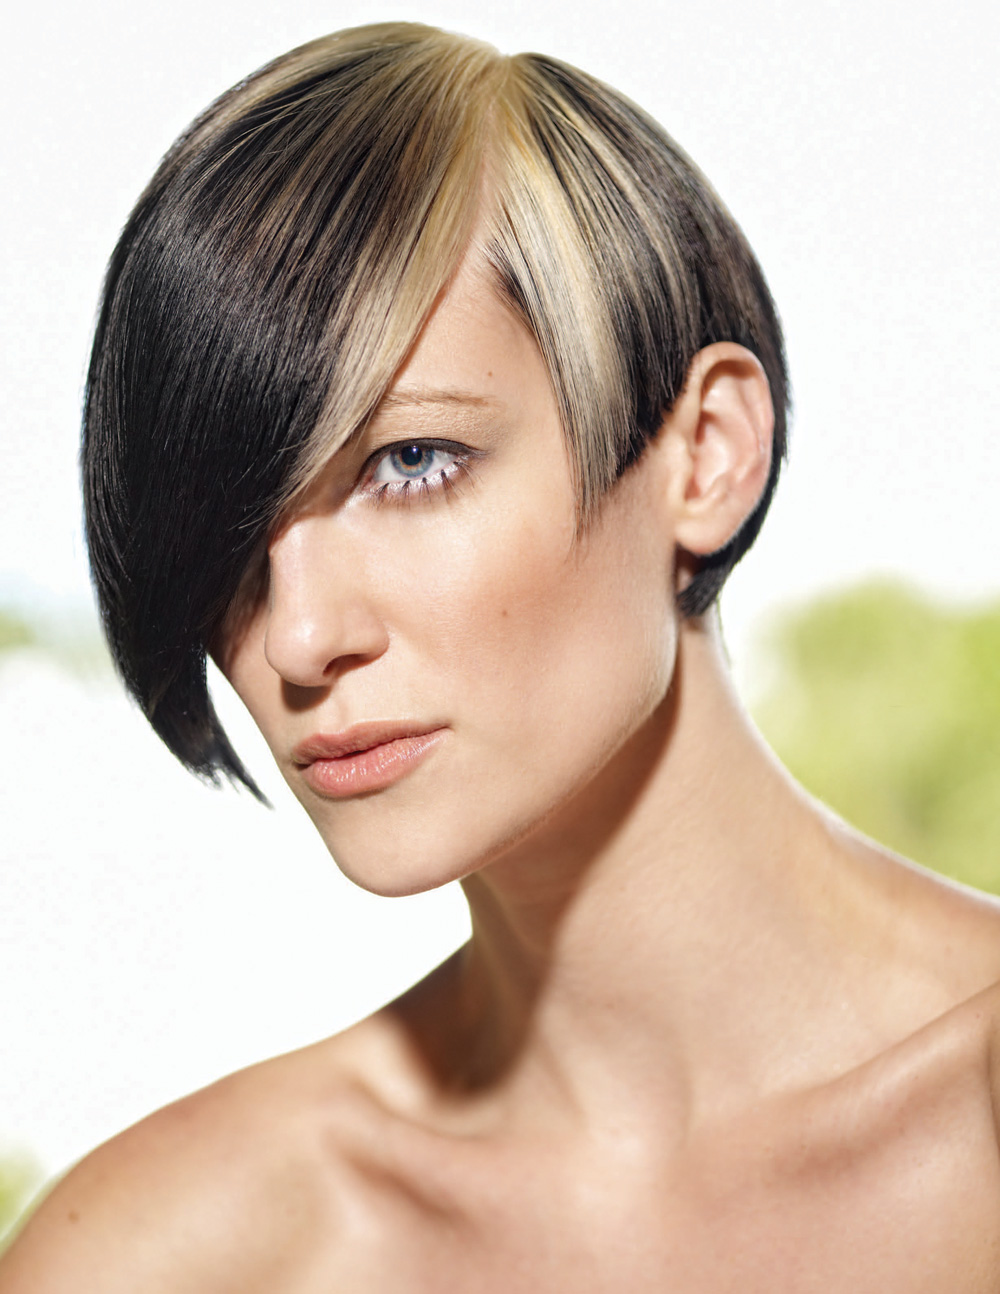
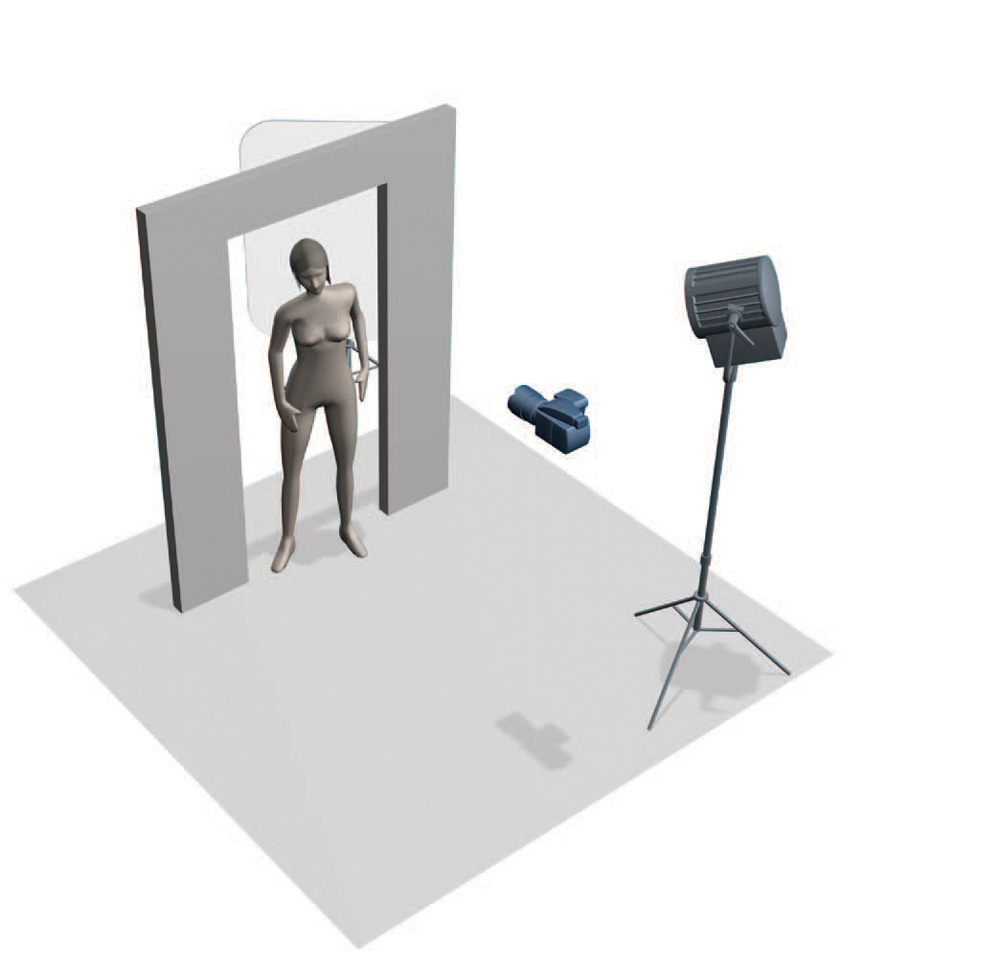
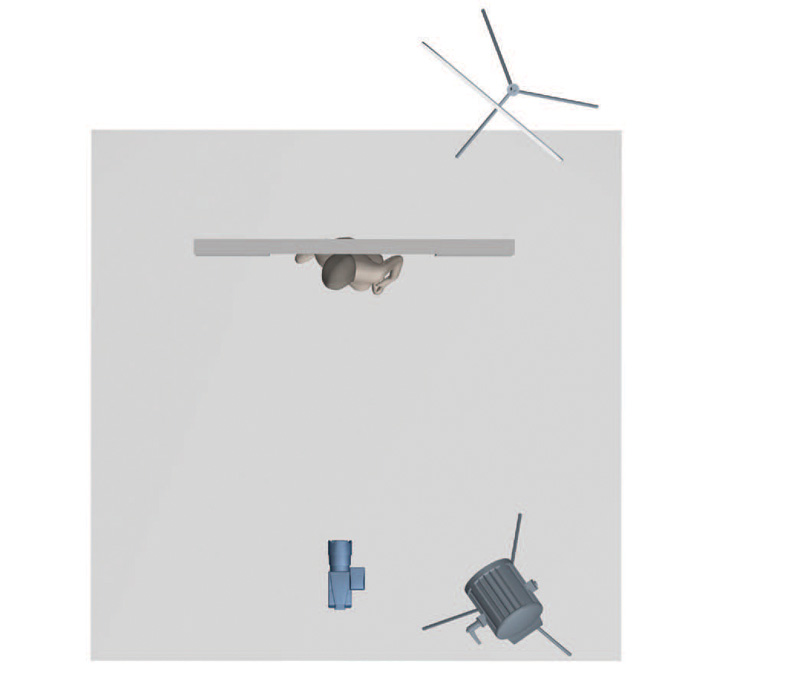
35| The Scoop
Working in different locations can be tricky at times, but it can also lead to interesting backgrounds and locations. For this image, three steel benches were placed on end behind the model to create the textured background. They were set far enough behind the model to fall out of focus but close enough to cover the frame.
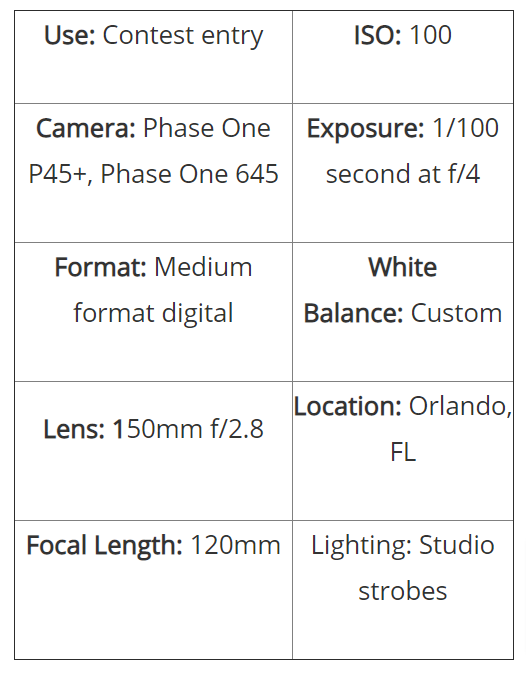
Tech
One overhead beauty dish was used as the main light and a silver reflector was used from below to add a bit of fill, lessening the shadow under the chin. A softbox strip light was used at camera right for fill, as well as to add a little illumination to the background. It was important that the faint blue coloring of the hair read in the image. This can be difficult with lighter hair, but it is manageable with careful metering.
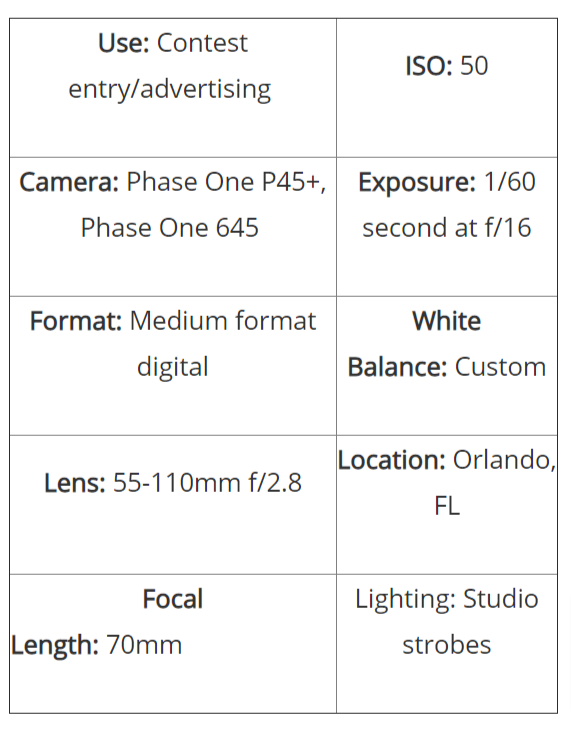
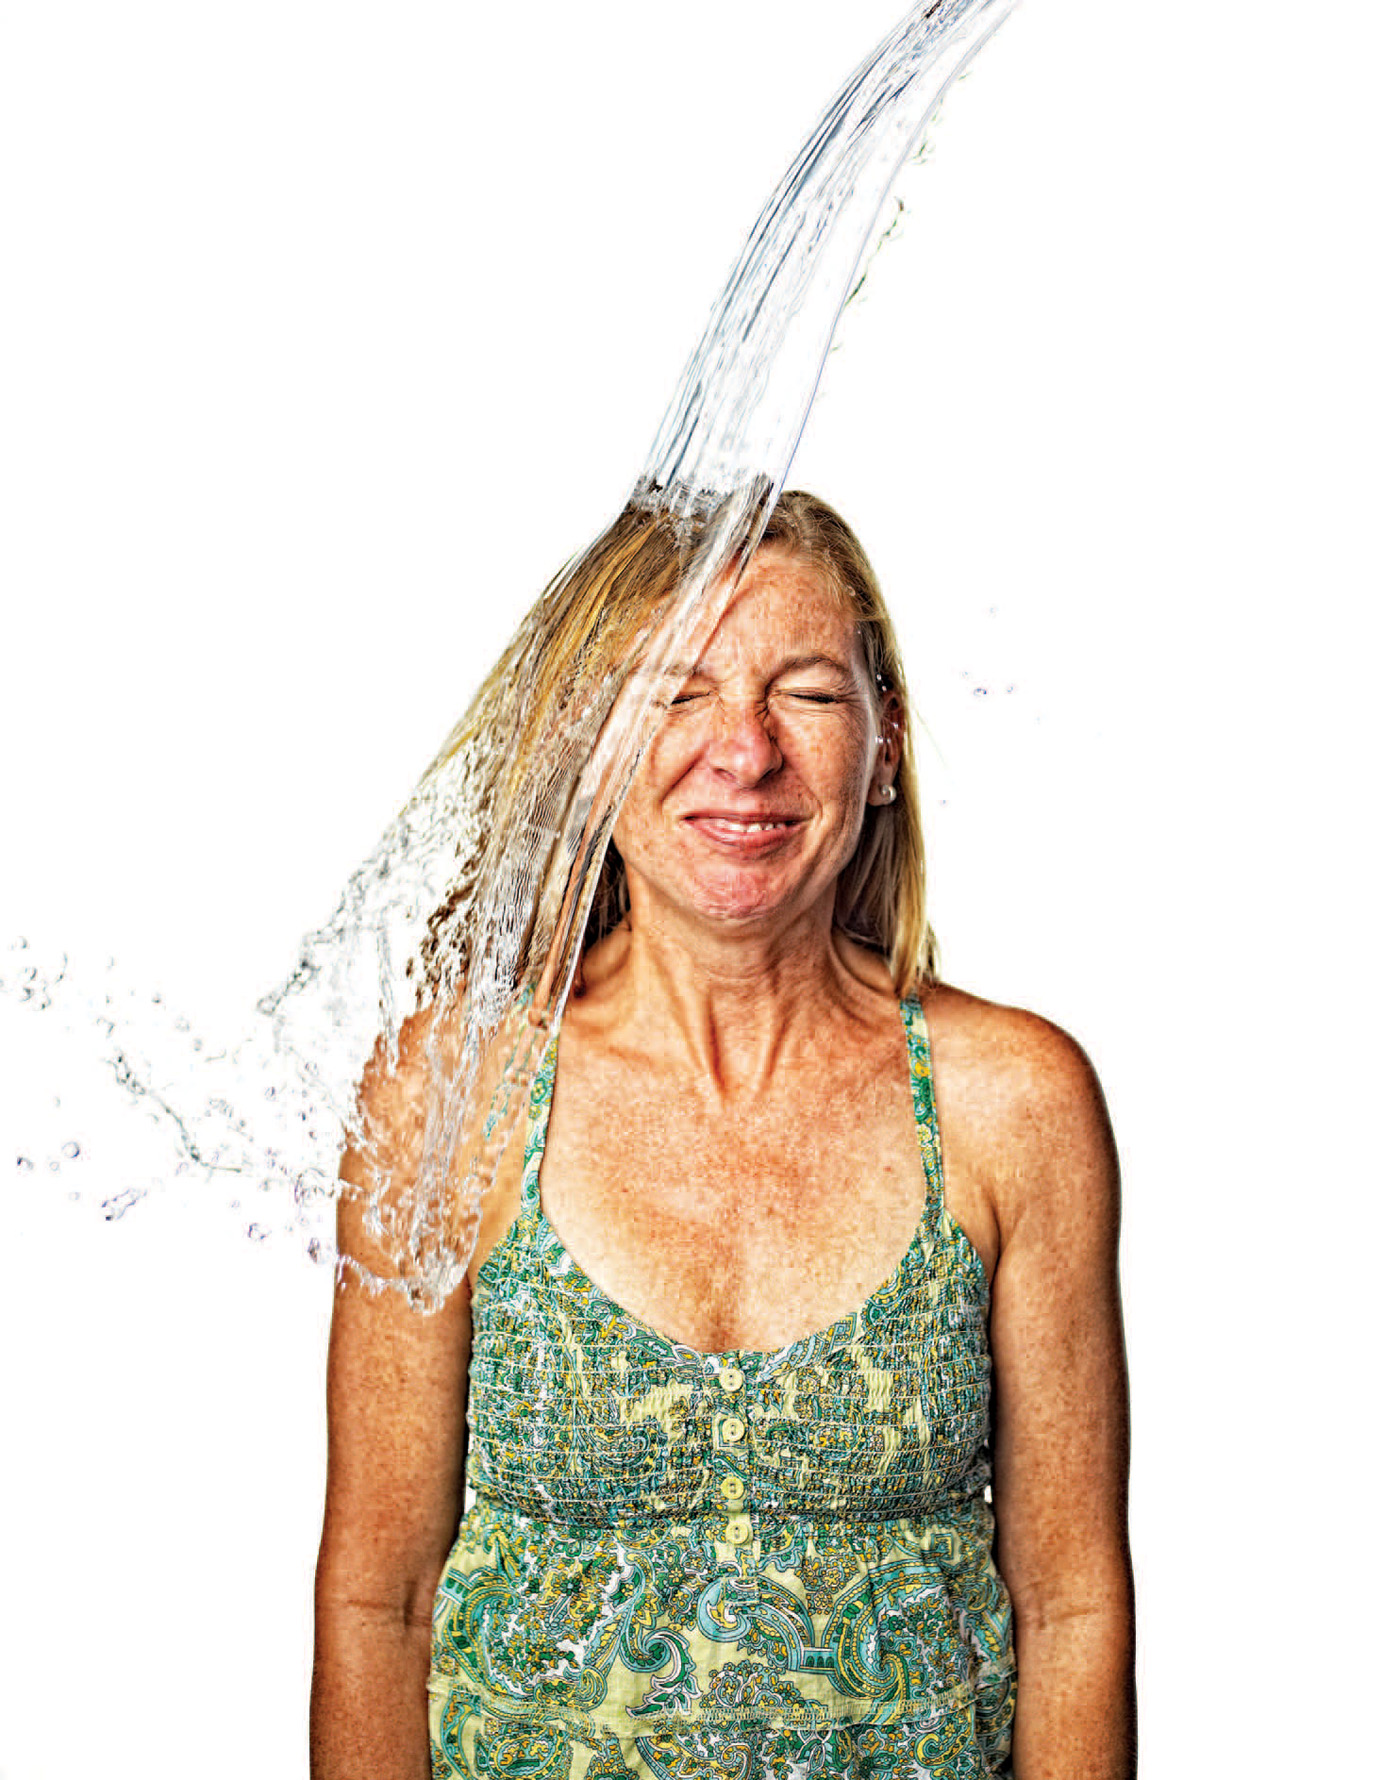
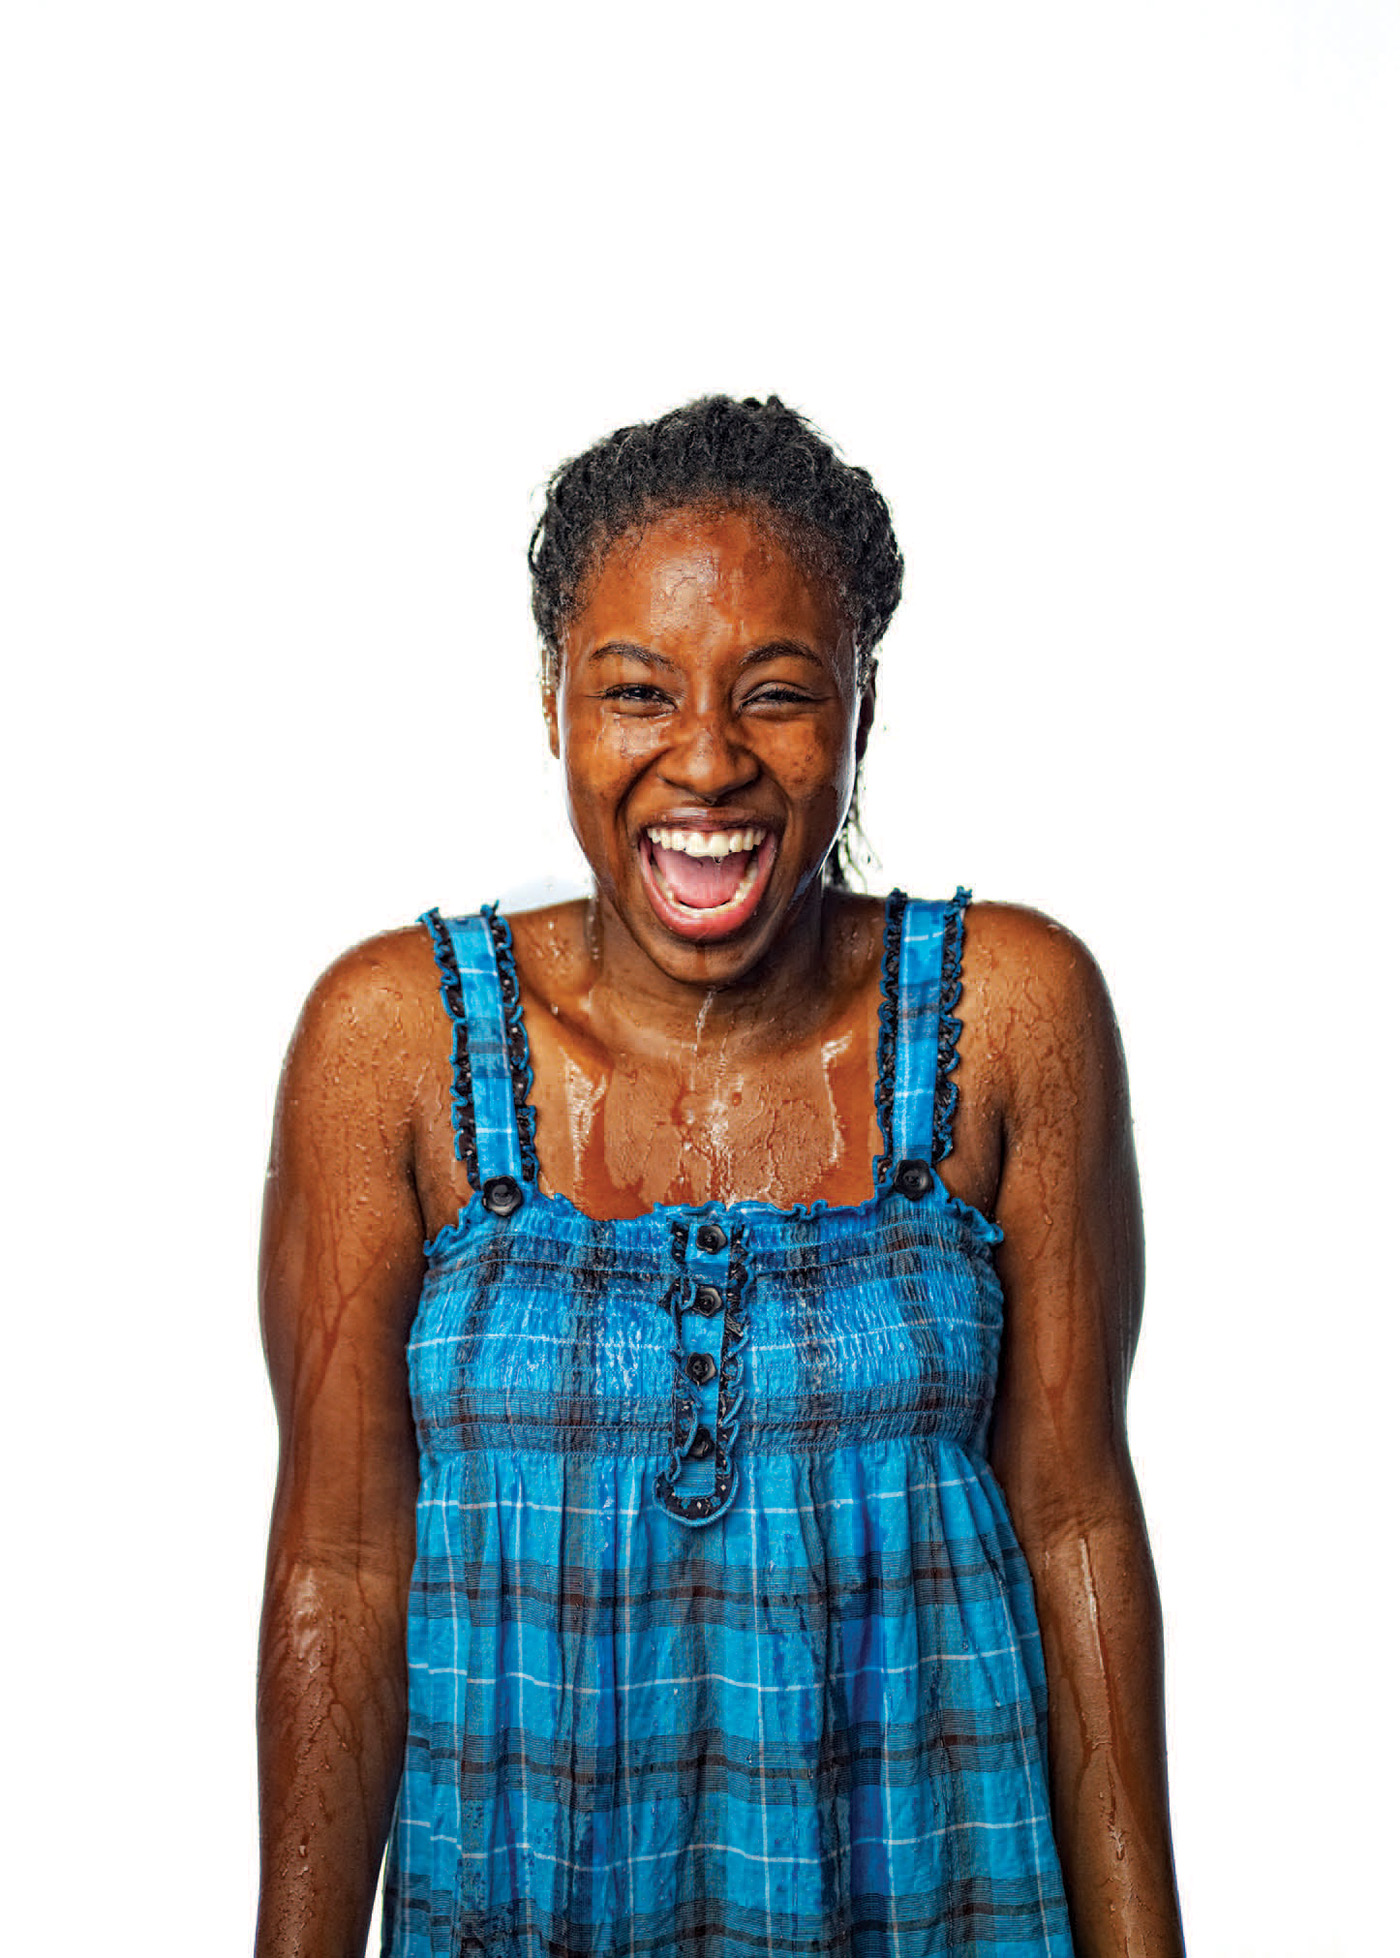
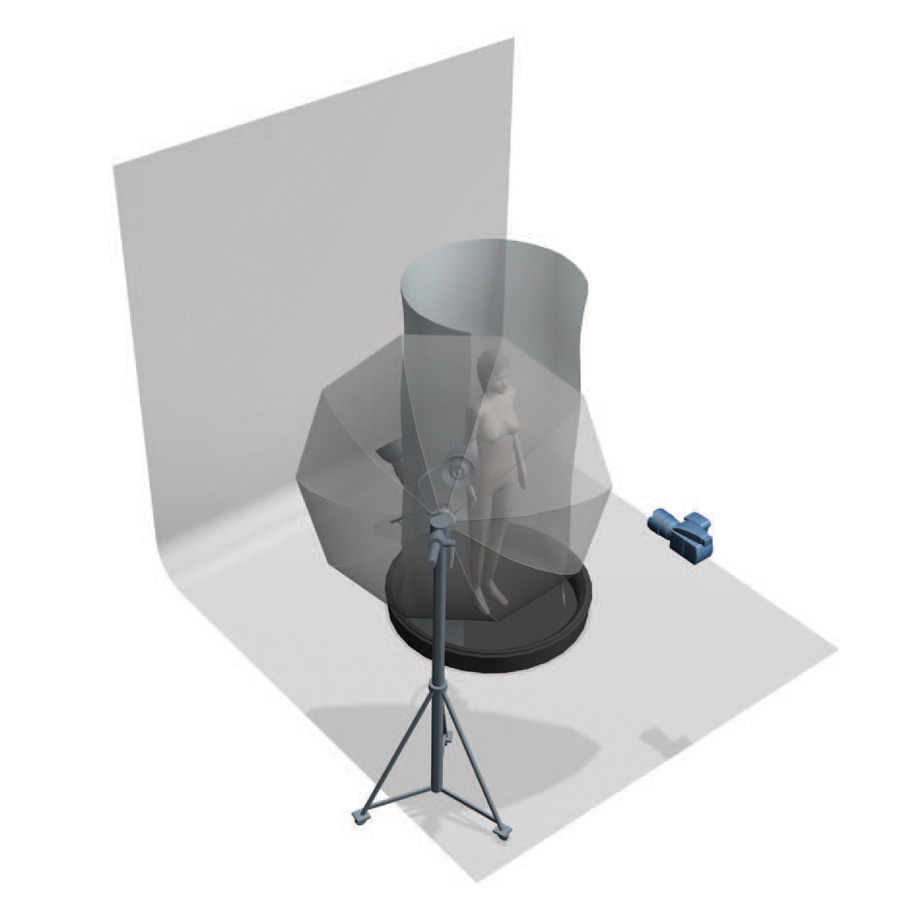
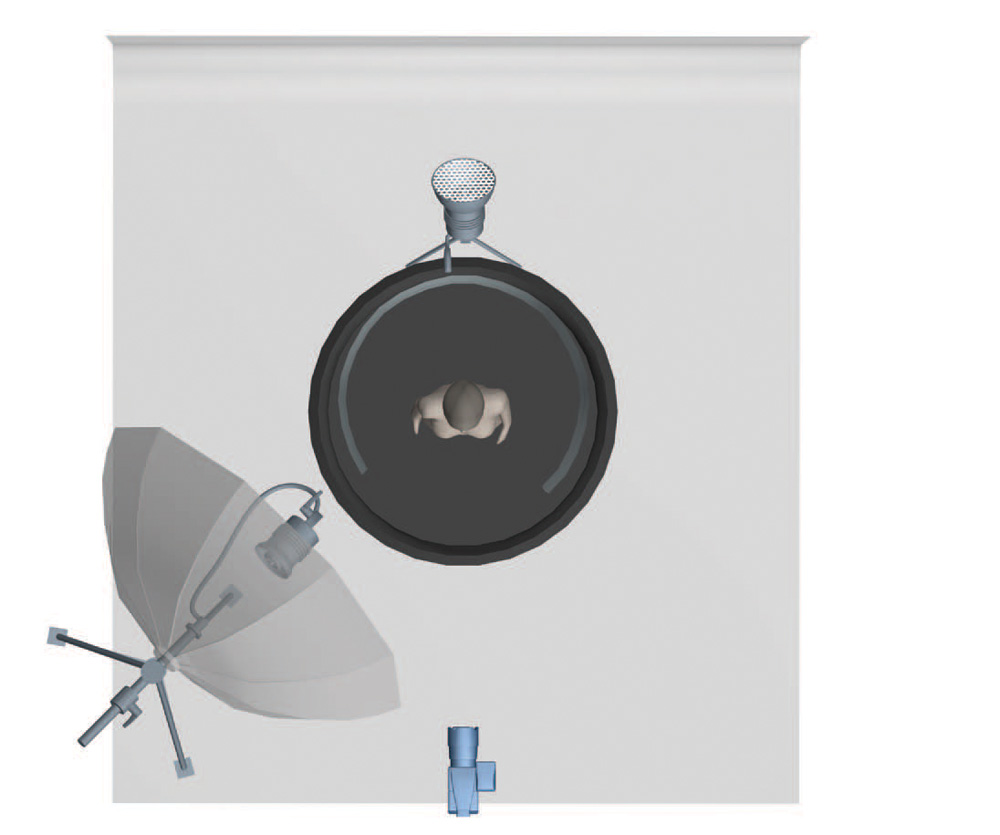
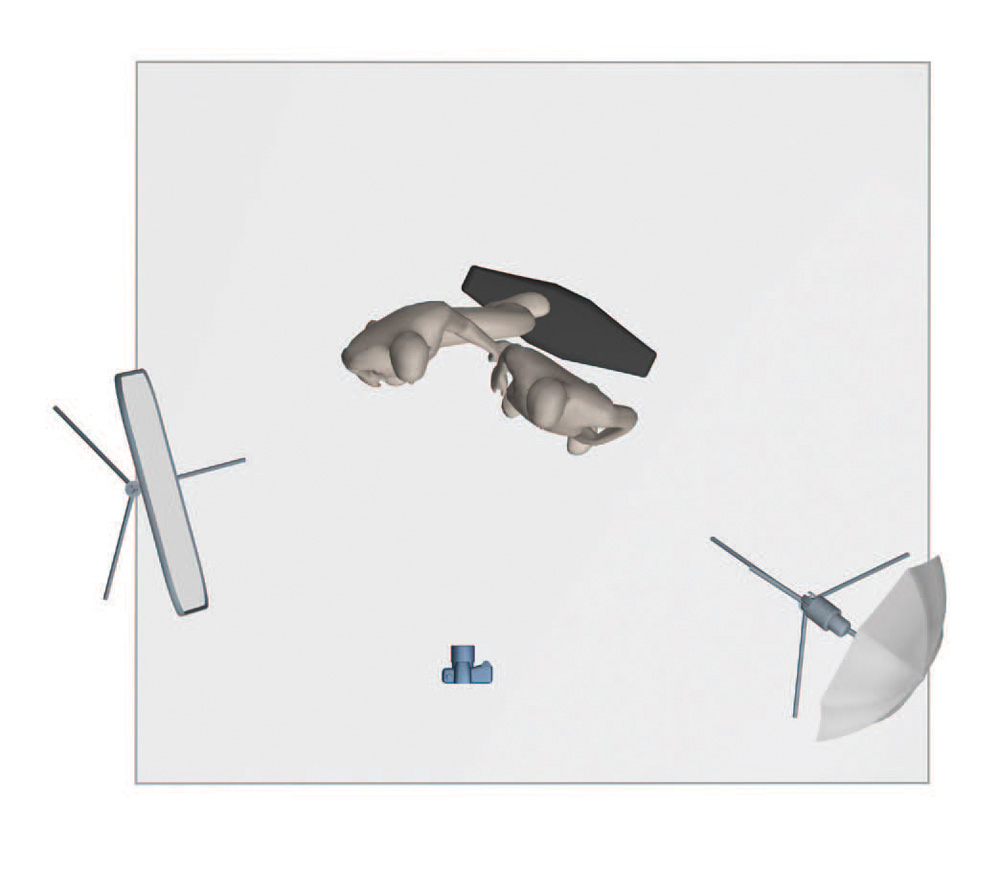
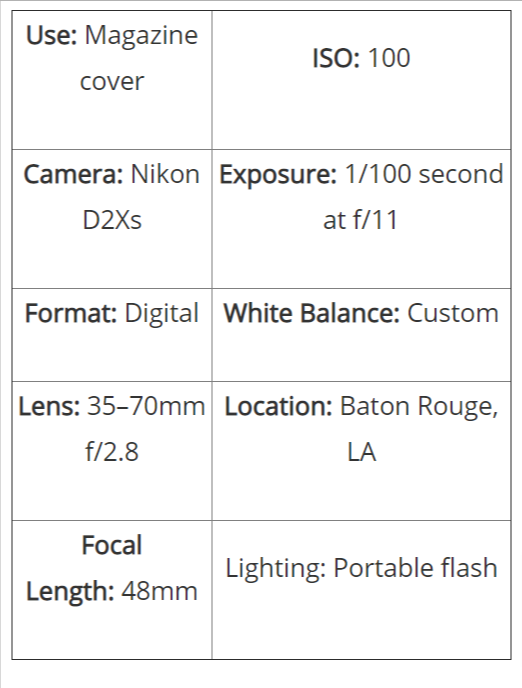
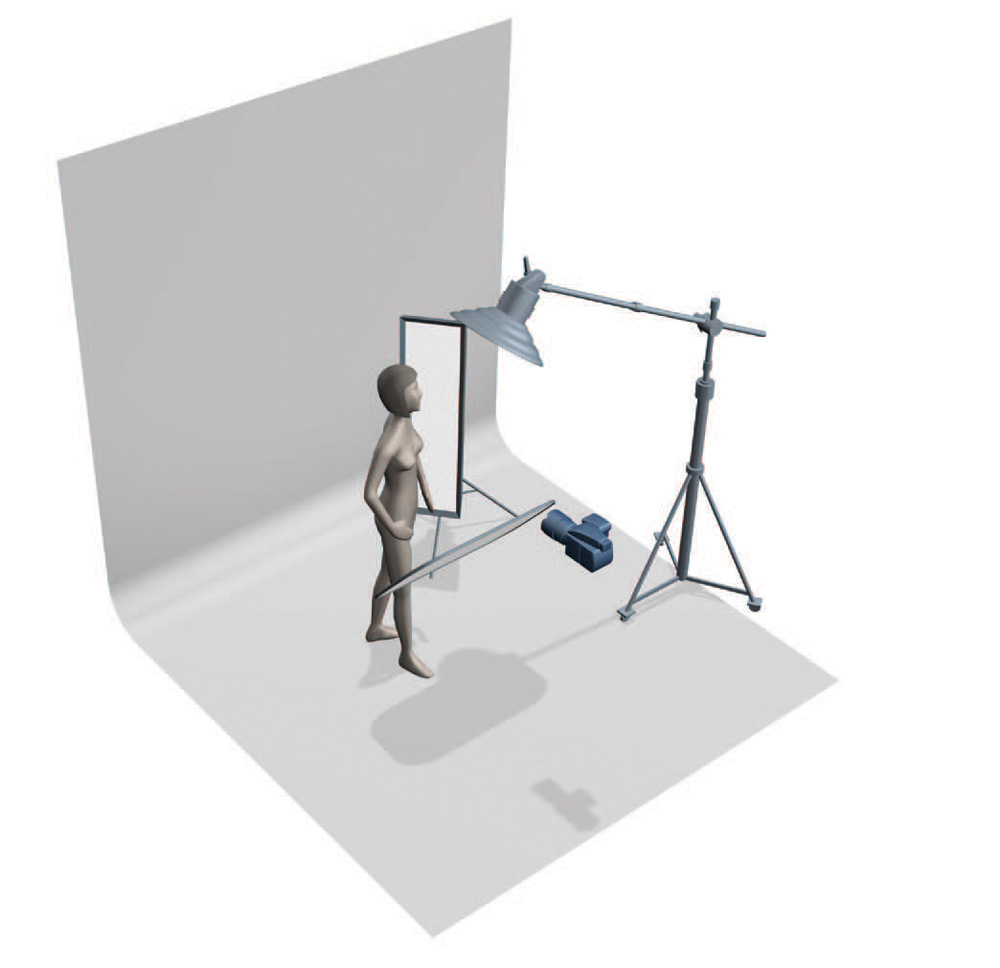
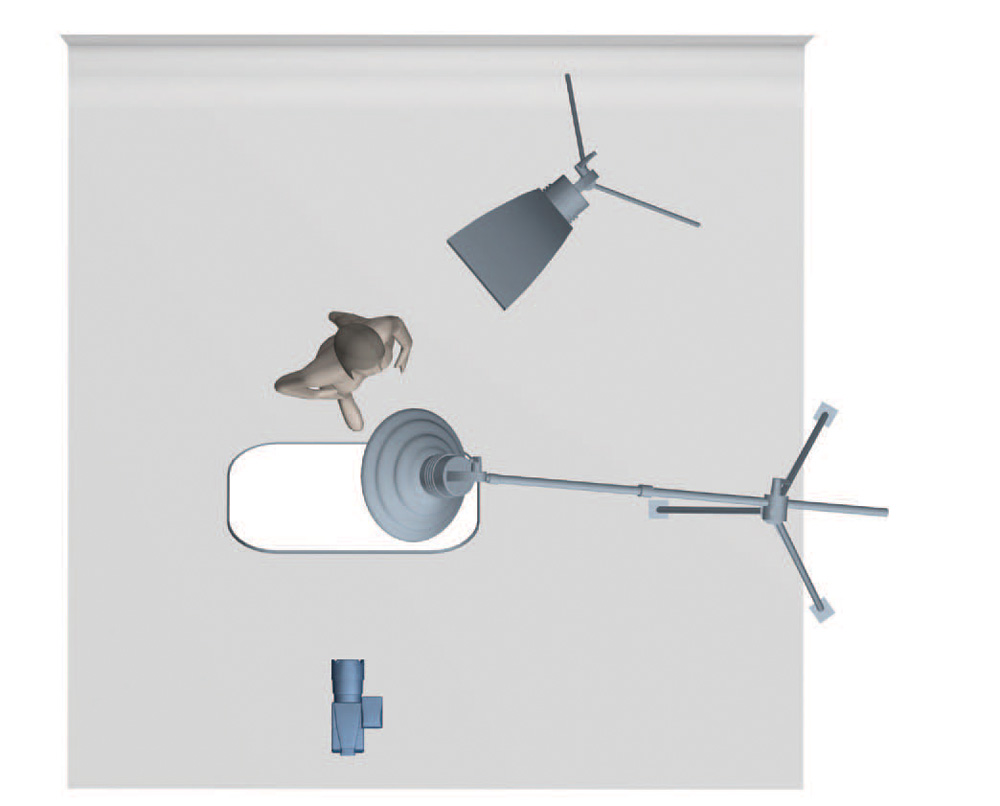
44 and 45| The Scoop
These images were part of a personal project where the intent was to capture the action and expression of my subjects as they had water poured over their heads. I chose lights that had an extremely short flash duration to stop the quick motion of the water pouring and freeze the subjects’ reactions as they flinched from the cold water.
Tech
The strobes that were chosen have a flash duration of 1/12,000 second but only at their lowest power setting. The low power setting on the lights also resulted in a very low aperture setting on the camera, so focusing was critical. I mounted the camera on a tripod and had each subject stand in a fixed spot. To check the focus, I took an initial portrait of the subject and reviewed it on the computer monitor. The extremely shallow depth of field caused some missed frames when the subjects shifted forward or backward—but the few lost frames were worth the resulting modern look of the final images. The lighting for these images was simple but well thought out. I knew that I wanted a broad light to get a nice, bright, high-key look. I also needed a somewhat hard light to make sure that there was detail in the water. Because of the splashing water, the lights could not be positioned too close to the subject, so a large five-foot umbrella was selected as the main light. Another light was used directly behind the model to light the background.
Careful metering was needed to ensure that the background light did not blow out the detail on the pouring water. The original sketch of my lighting setup included two side lights to achieve the edge highlights on the subjects’ faces. However, as we tested the lighting scenario we found that, because of the light bouncing off of the plastic we used to protect the studio from water, additional side lights weren’t needed.
