Metering a Fashion Shoot
In this article from our Professional Photographers on Light Metering series, Octavian Cantilli divulges all the details of his lighting setups and metering techniques for fashion shoots with white, gray, and black backgrounds.
In this day and age, some photographers argue that a handheld light meter is no longer needed, because the instant proofing that digital photography provides gives way to the simple philosophy that if an image looks too dark you should just lighten it. If it looks too bright, you should darken it. I wholeheartedly disagree! If you are into a meticulous, measurable, yet still evaluative approach to lighting, then a handheld light meter is absolutely needed. It’s true that keen-eyed photographers can set their lighting ratios by eye, but it would take even the best lighting gurus longer to get their lighting right compared to a mere mortal photographer with a plan and a light meter. Plus, there is no way to record and then duplicate the exact lighting you used on a shoot again on another shoot if you didn’t use a light meter to measure the output of each light used.
Below is my approach to using a light meter on a recent multi-setup fashion shoot.
On White
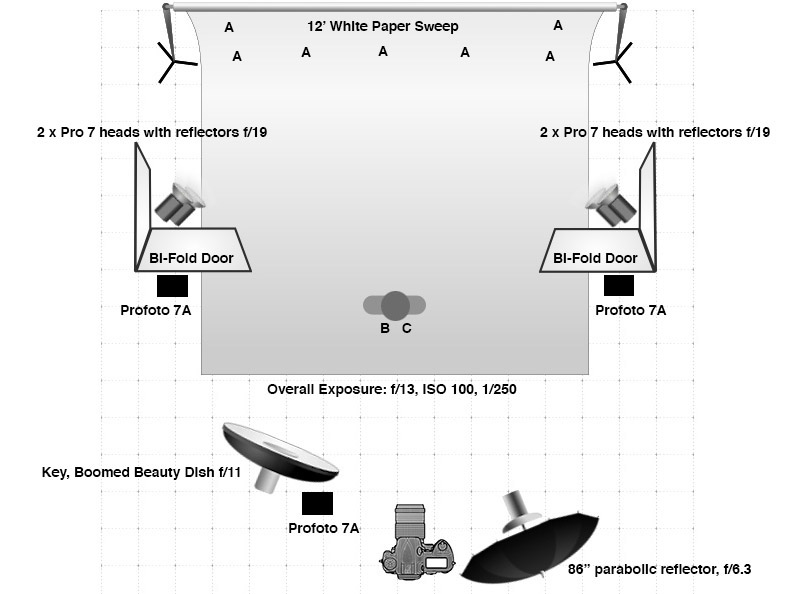
Goal: I wanted the background to be pure white and to give the model in the foreground some wraparound side highlights. I wanted the key light to come from camera left and a large fill light to come from camera right and provide shadow detail throughout the image.
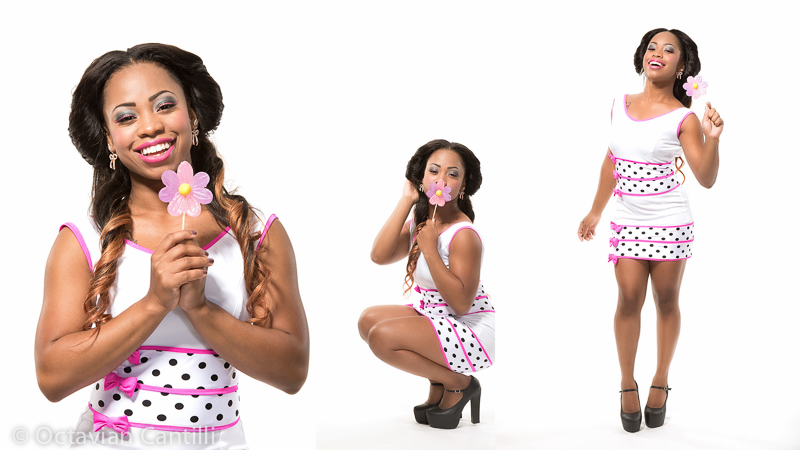
Execution: First, I picked an f-stop for my subject (f/11) and went in reverse. If f/11 was my target exposure, then the background needed to be about f/19 or 1.5 stops hotter. Using my trusty Sekonic L-558R with the RT-32 module (which allows the meter to trigger PocketWizard radios), I dialed in and positioned my background lights so that the meter read f/16.5 + or –0.2 across the white seamless from top to bottom and left to right. Then, I turned those off and set my key light to output f/11. Last but not least, I set my 86” parabolic fill, the largest light modifier I have, to about 1.5 stops under or f/6.7. Once all of the lights were dialed in and in position, the overall exposure turned into f/13 due to the additive properties of all of the lights together.
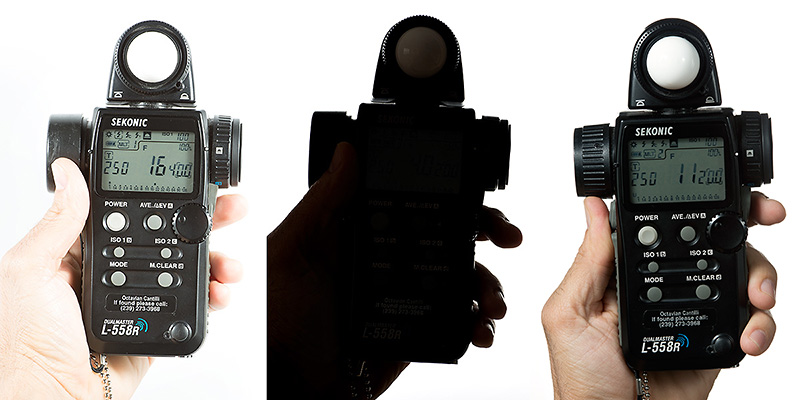
Above is how the meter looked in three situations from this shoot, and all were taken with the camera set to the overall exposure of f/13, ISO 100, 1/250 second. The reading on the meter looks a little misleading until you understand the way it displays information. The big number is always in whole stops and the little number afterwards reads in tenths of a stop, so:
Left: With only the background lights on, the reading throughout the white sweep is 16.4 or f/19. Notice that the meter looks at least a stop too hot.
Middle: With only the background lights on, the reading where the subject will stand is a barely readable 4.2 of f/4.5. Notice that even though the subject is in complete shadow with slight wraparound light, the background is still pure white.
Right: With all of the lights on, the reading where the subject will stand is 11.2 or about f/13. Notice that the meter looks great, just as the model should in its place.
On Gray
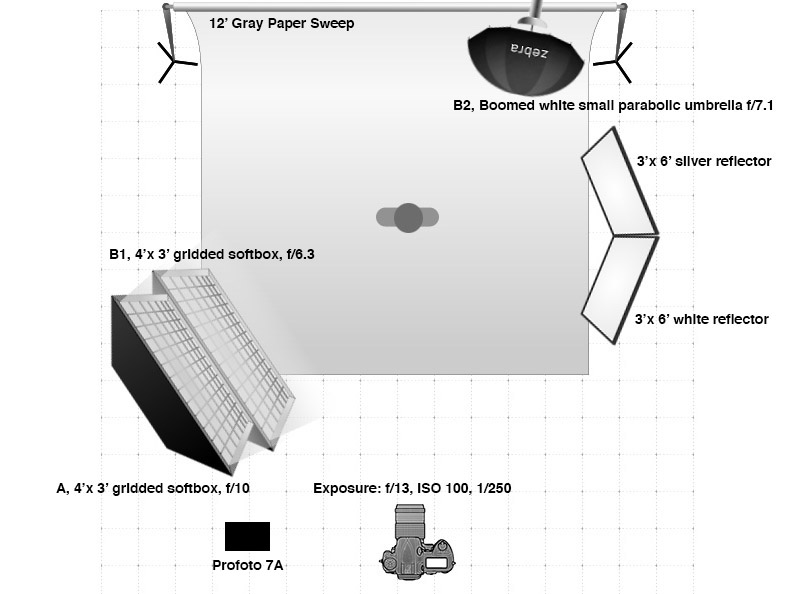
Goal: I wanted a large directional light source to light across the model (a kind of cross between clamshell lighting and Rembrandt lighting) and a background light to create a gradient on the gray sweep that looks like a continuation of the main light. Large reflectors will fill in the shadows from camera right.
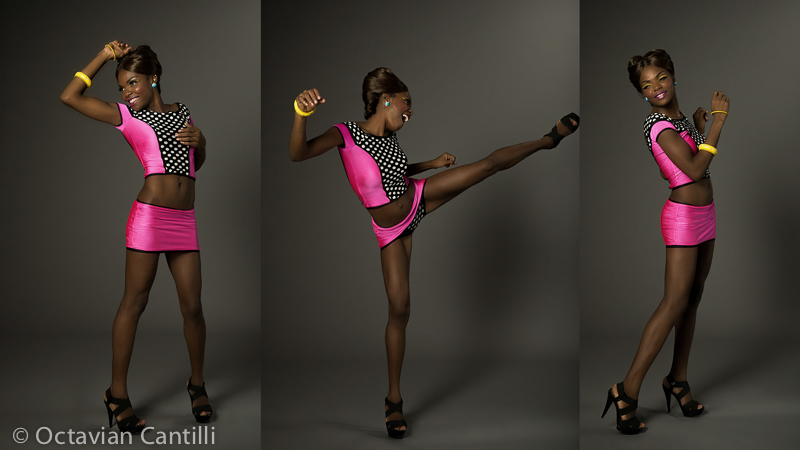
Execution: Since I wanted to go from one setup to the next with as little camera setting change as possible, I wanted to keep the overall exposure at f/13. This time I started with the main lights. I dialed it in at f/13, but I wasn’t happy with the look. I dialed the top light to f/10 and the bottom light to f/6.3, and together they produced f/11. Then, I played with the background light until I was happy with the result, which ended up being f/7.1.
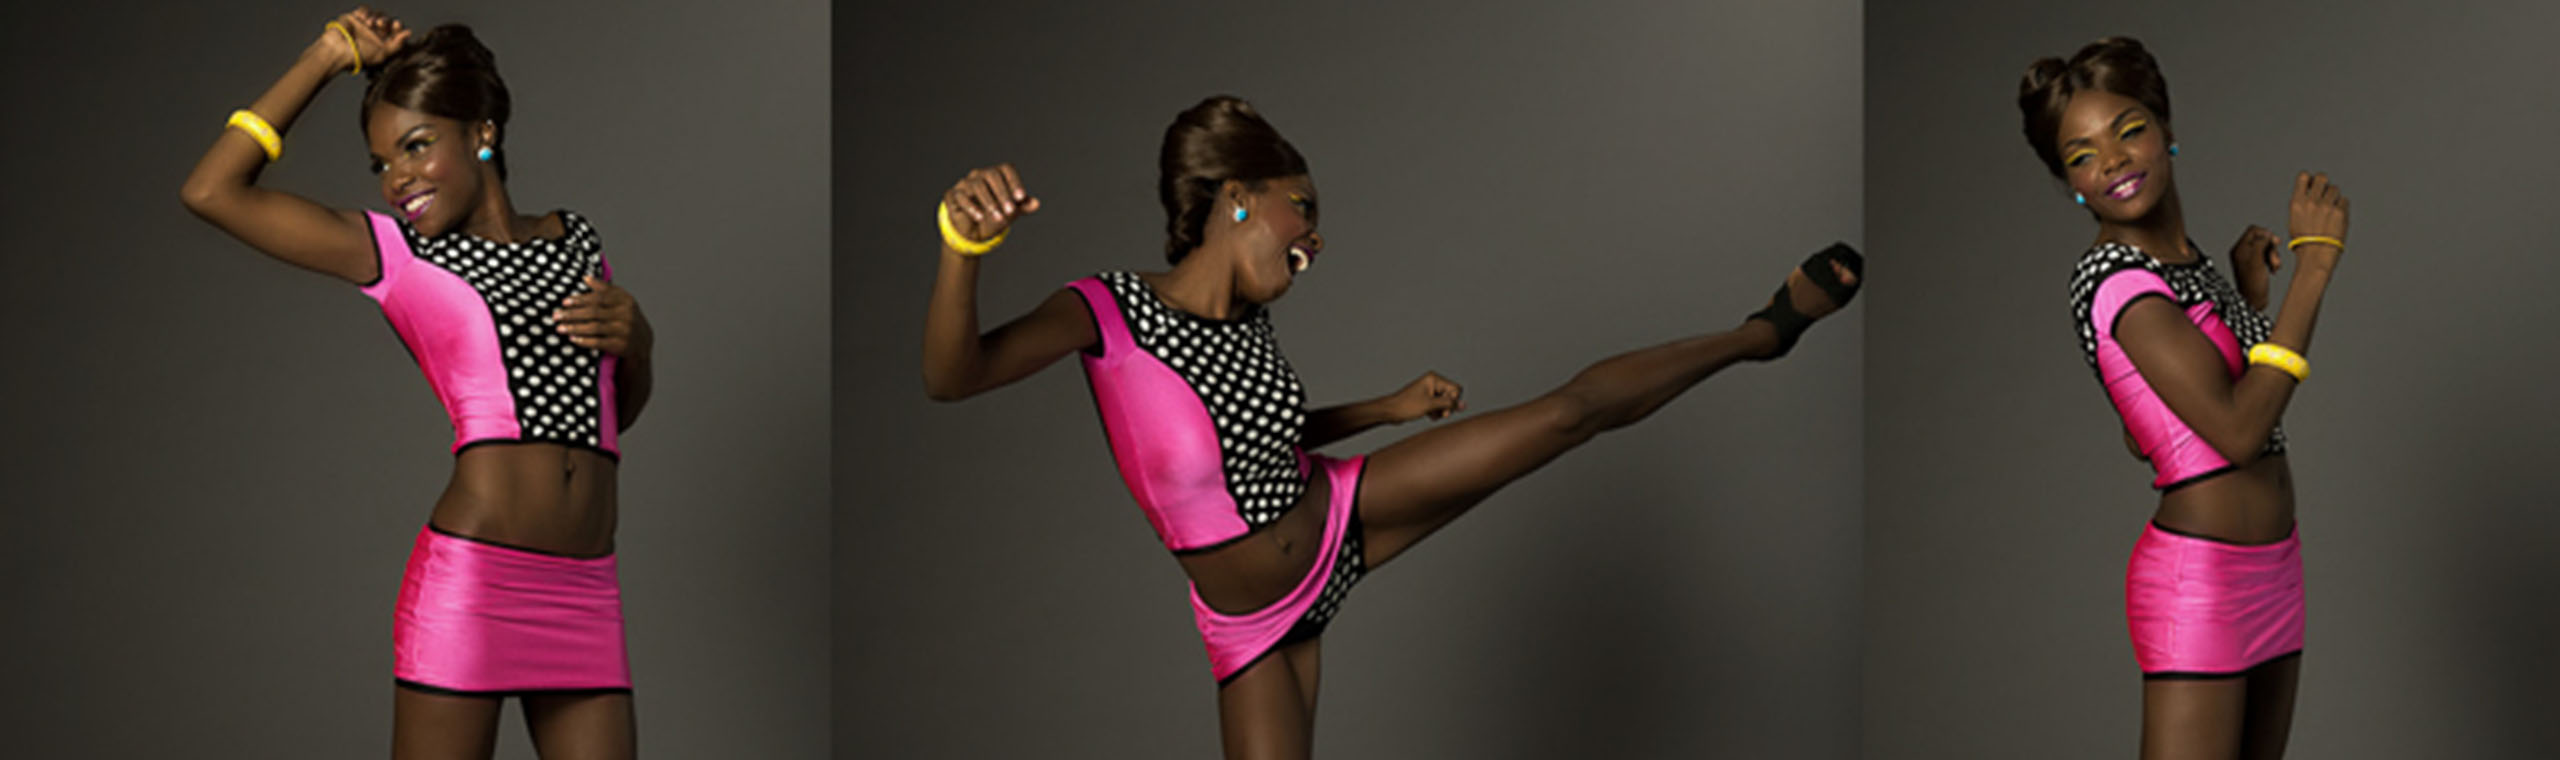
On Black
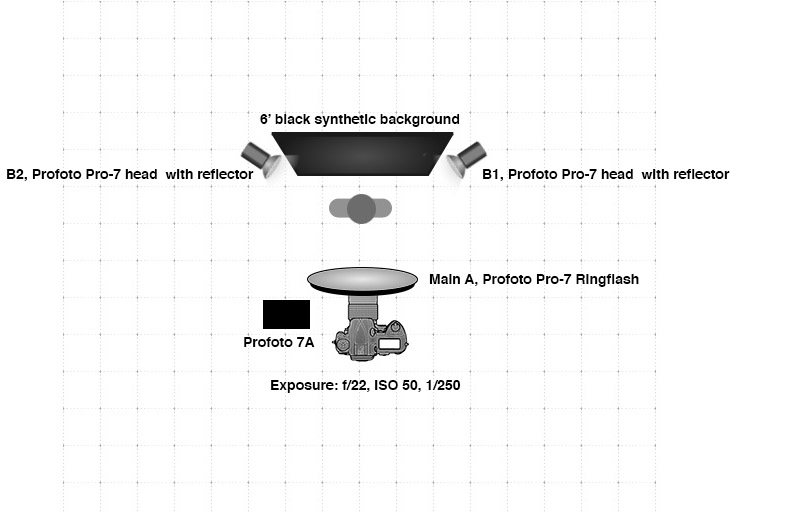
Goal: I wanted a huge circular catchlight in the eyes with side light that’s slightly hotter than the main light.
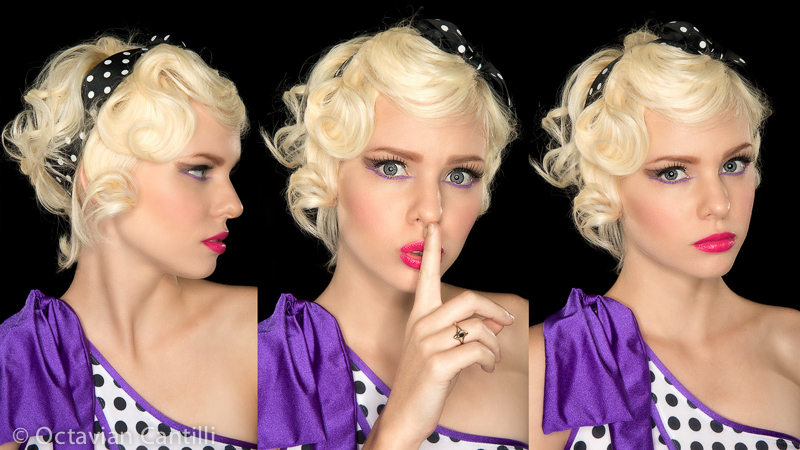
Execution: I had to settle for the best I could do with this setup. Even on the lowest setting, this ringlight in a Profoto Pro-7a gave me f/22 at four feet away from the model. I wanted to get the light in much closer, but without any ND filters, four feet was as close as I could come while still getting a correct exposure. The side lights were set to two-thirds of a stop hotter than the main light.
Octavian Cantilli is an Orlando FL-based photographer who specializes in natural, moment-based imagery and personality portraiture. You can see more of his work on his Web site.
Read more from Octavian Cantilli and other working pros in our Professional Photographers on Light Metering series: