Creating Simple Fill Light
Photographer Ab Sesay explains how to combine a well-defined main light with a subtle fill to create a dramatic yet flattering light.
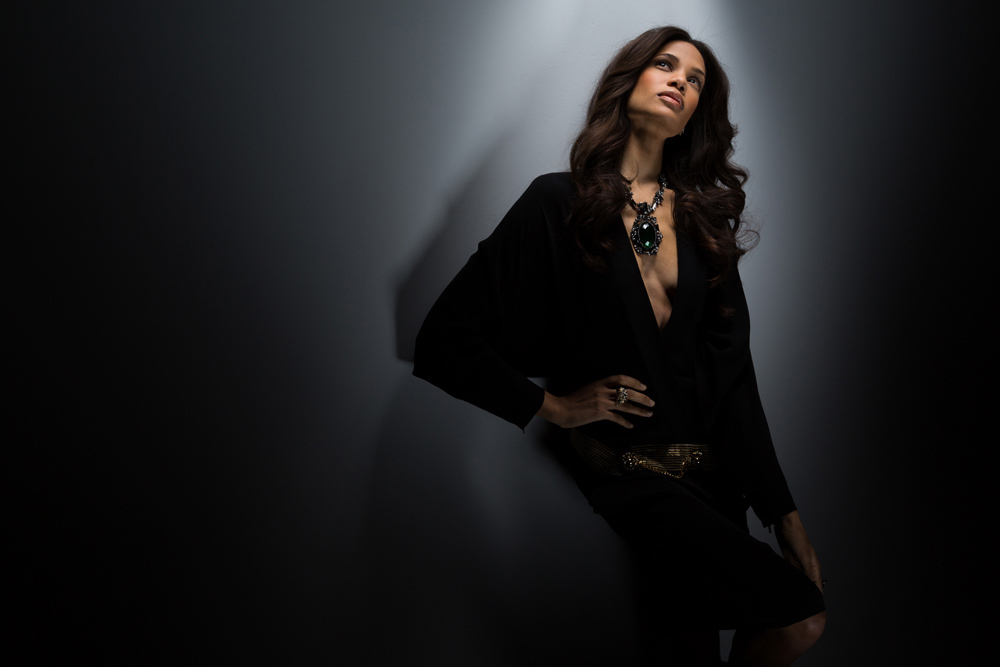
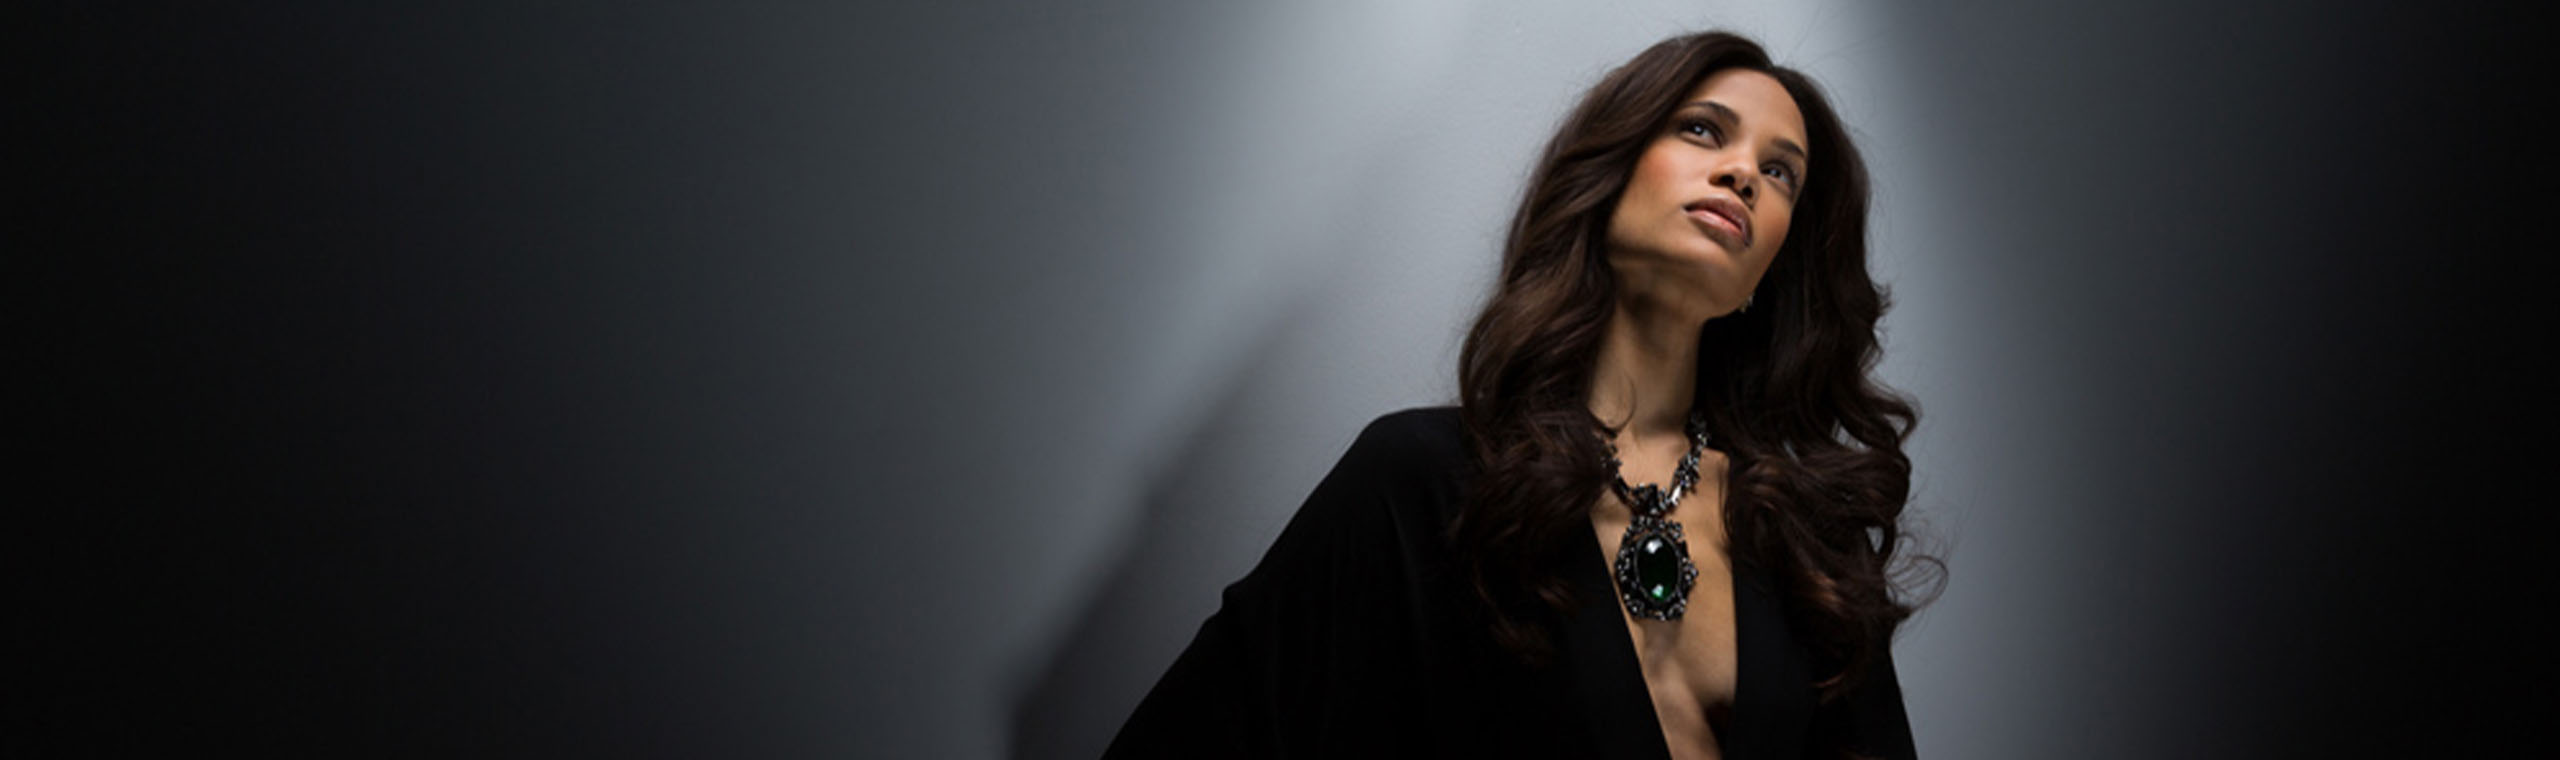
In the shot above, less is more. I used a white beauty dish with a grid above the model, and a white beauty dish without a grid on the floor below her.
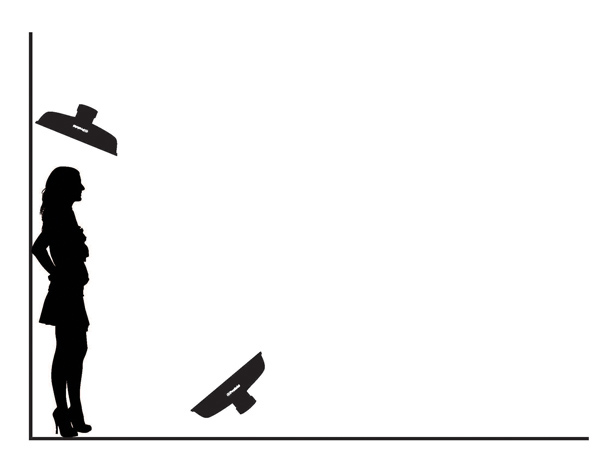
The upper beauty dish was positioned about 1 foot above the model’s head. The proximity of the light to the model created very drastic fall off, but the size of the light source relative to the size of her head still resulted in a soft, flattering light.
I wanted to add fill light, but I didn’t want to lose the drama of the beauty dish overhead. I used the second beauty dish down below because a beauty dish is very shallow and could give me an even, controllable kiss of light. It gave me detail in the model’s hands, her dress, and the shadows on her face, but didn’t reduce the dramatic quality of the main light.
To meter the top beauty dish, I metered toward the light to protect the highlights on the model’s nose and forehead. I set the fill light 1.8 stops below the exposure of the top beauty dish. When metering the fill light I metered it from the position of the model’s face. A difference of 1.8 stops may seem extreme, but when metered around where her hands fall there is only about a stop difference.