Using Gels

Photographer Ab Sesay explains how to meter gelled light to get exposure and color saturation right, and how to use the Sekonic L-478 meter's built-in compensation calculator to make the process quick and simple.
Using gels can be tricky. Many complain about not being able to get proper saturation with them, for instance having a red gel looking light pink or magenta. A meter is an integral part of getting the color you want from your gels.

To get the proper color out of your gels, you want to first meter the light you intend to use without a gel in front of it. Next, place the gel over your light. Finally, to get the proper exposure, you will need to find out the proper exposure compensation, often listed on gel manufacturer Web sites as absorption.

For example, let’s say you’re using a Lee 027 gel that is a deep red and has an absorption value of 1.44 when using light with a color temperature of 6,774K. If you metered the light without that gel at f/11, you would want to set your exposure to f/7.1 if your camera is in third stops. If you try to meter the gelled light instead of trusting your meter’s reading and the compensation number, you will get f/2.8, which will result in a washed-out red.

Remember that when dealing with gels, the color of the subjects and the lights they mix with play a huge role in maintaining a gel’s color fidelity. White is the best color, as it has the ability to reflect all colors. Other colors may not reflect red, even though they are getting hit with red light, and thus deliver undesirable results.

For this series of shots, first the Profoto ZoomSpot was used to create the triangular shape on the wall. It was metered at f/8. I then wanted to fill in the shadows around the wall with a vibrant red. I set a Profoto Magnum Reflector just above and in the same line as the Profoto ZoomSpot. The Sekonic L-478 meter has a function that allows me to store the filter compensation associated with different gels. I dialed in the Lee 027 and metered the Magnum Reflector without the gel until it metered f/8. So in reality, it was set to around f/13. But I like to use the meter function because it can remember the desired filter compensation, and it does the math better than I do when not working in quarter or third stops. With this formula you will easily be able to cancel out a good deal of the red in the spotlight as well as on the model.
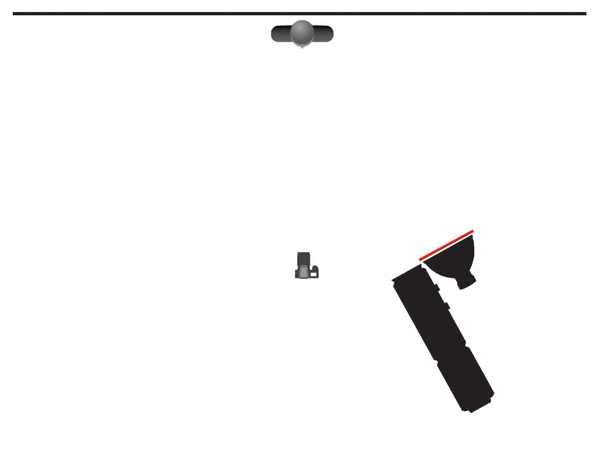
A few final thoughts on the pros and cons of this setup, which is shown in the diagram above:
Pros: With only two lights, this lighting scenario is relatively easy to set up.
Cons: Equipment for this setup is relatively expensive. Focused lights of this nature are not very efficient, so at full power from a distance of about 10 feet away, you only get to about f/8. When using Profoto ZoomSpots, you are also going to want to use a heavy-duty roller stand.